How to develop your Ren'Py project with Xcode
It’s safe to say that I’ve gotten back to using Xcode. A lot. I’m playing around with new SwiftUI features and use Xcode to manage the new version of my website.

It’s safe to say that I’ve gotten back to using Xcode. A lot. I’m playing around with new SwiftUI features and use Xcode to manage the new version of my website. In fact, I’ve started to find ways to better integrate Xcode into my workflow, especially since Xcode 11 is bringing some awesome new features to the table that just make sense for an editor (you can learn more here).
Of course, this means taking a look at the existing tools I have and finding a way to Xcode-ify them. Since most of my project are already Xcode-ready, the only project that I noticed that needed a little bit of attention was Project Stein, the DDLC mod that I have featured on the homepage. While using VS Code is nice, I still prefer pushing everything into one IDE that makes sense. So, recently, I’ve discovered a way to make Xcode a decent editor/IDE for Ren'Py projects without needing to really touch Ren'Py again. This includes building and running a Ren'Py project, though I have yet to tackle archiving and releasing.
Enra, if you’re reading this, please don’t scream your head off. Xcode’s gotten a lot better since I last used it.
So, I’d like to highlight how I managed to pull this off with a DDLC mod so that anyone can easily do this. This should also work with future versions of Xcode and Ren'Py, though I’m currently using the appropriate versions for this project at the time of writing: Xcode 11 Beta and Ren'Py 6.99.12.4.
Note: The following screenshots might differ depending on your version of macOS and/or Xcode. Again, I’m using Xcode 11 beta on macOS 10.15 (Catalina) developer beta.
Creating an Xcode project file
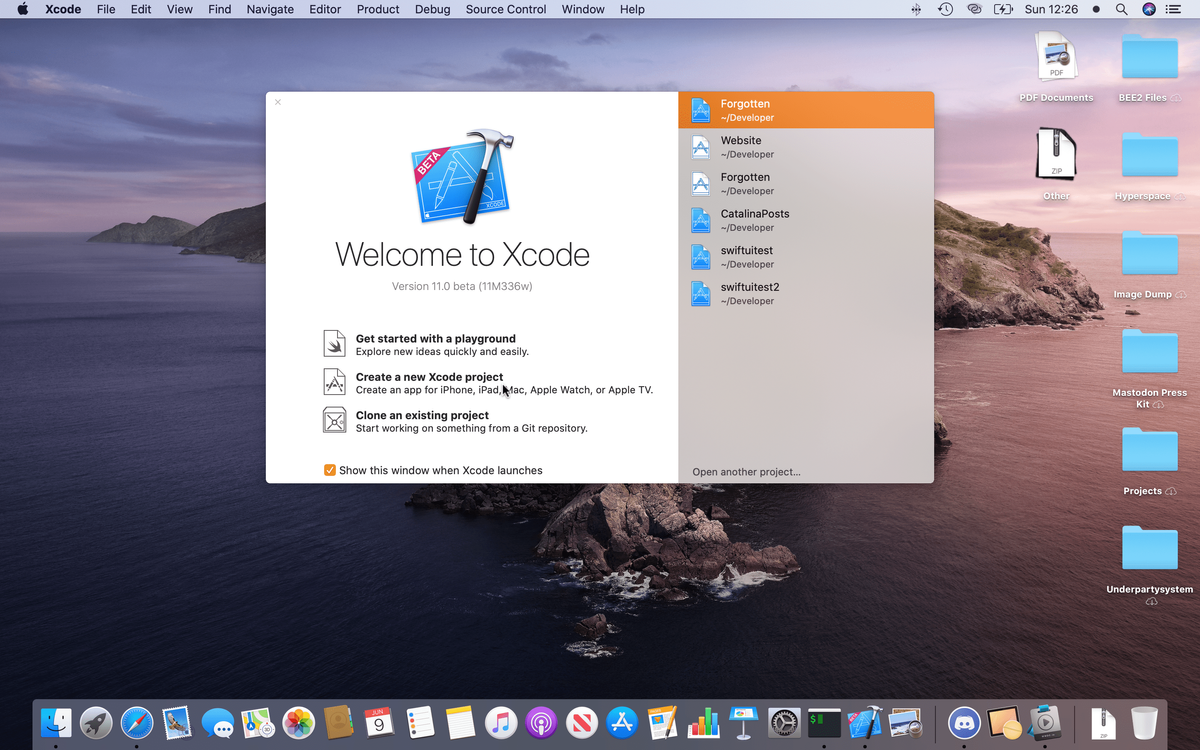
First, launch Xcode and create a new Xcode project. Although the project button says “Create an app for iPhone, iPad, Mac, Apple Watch, or Apple TV”, we’ll make our project work so that it doesn’t try to use any of Apple’s building tools like as if it’s an Apple-platform-specific app.

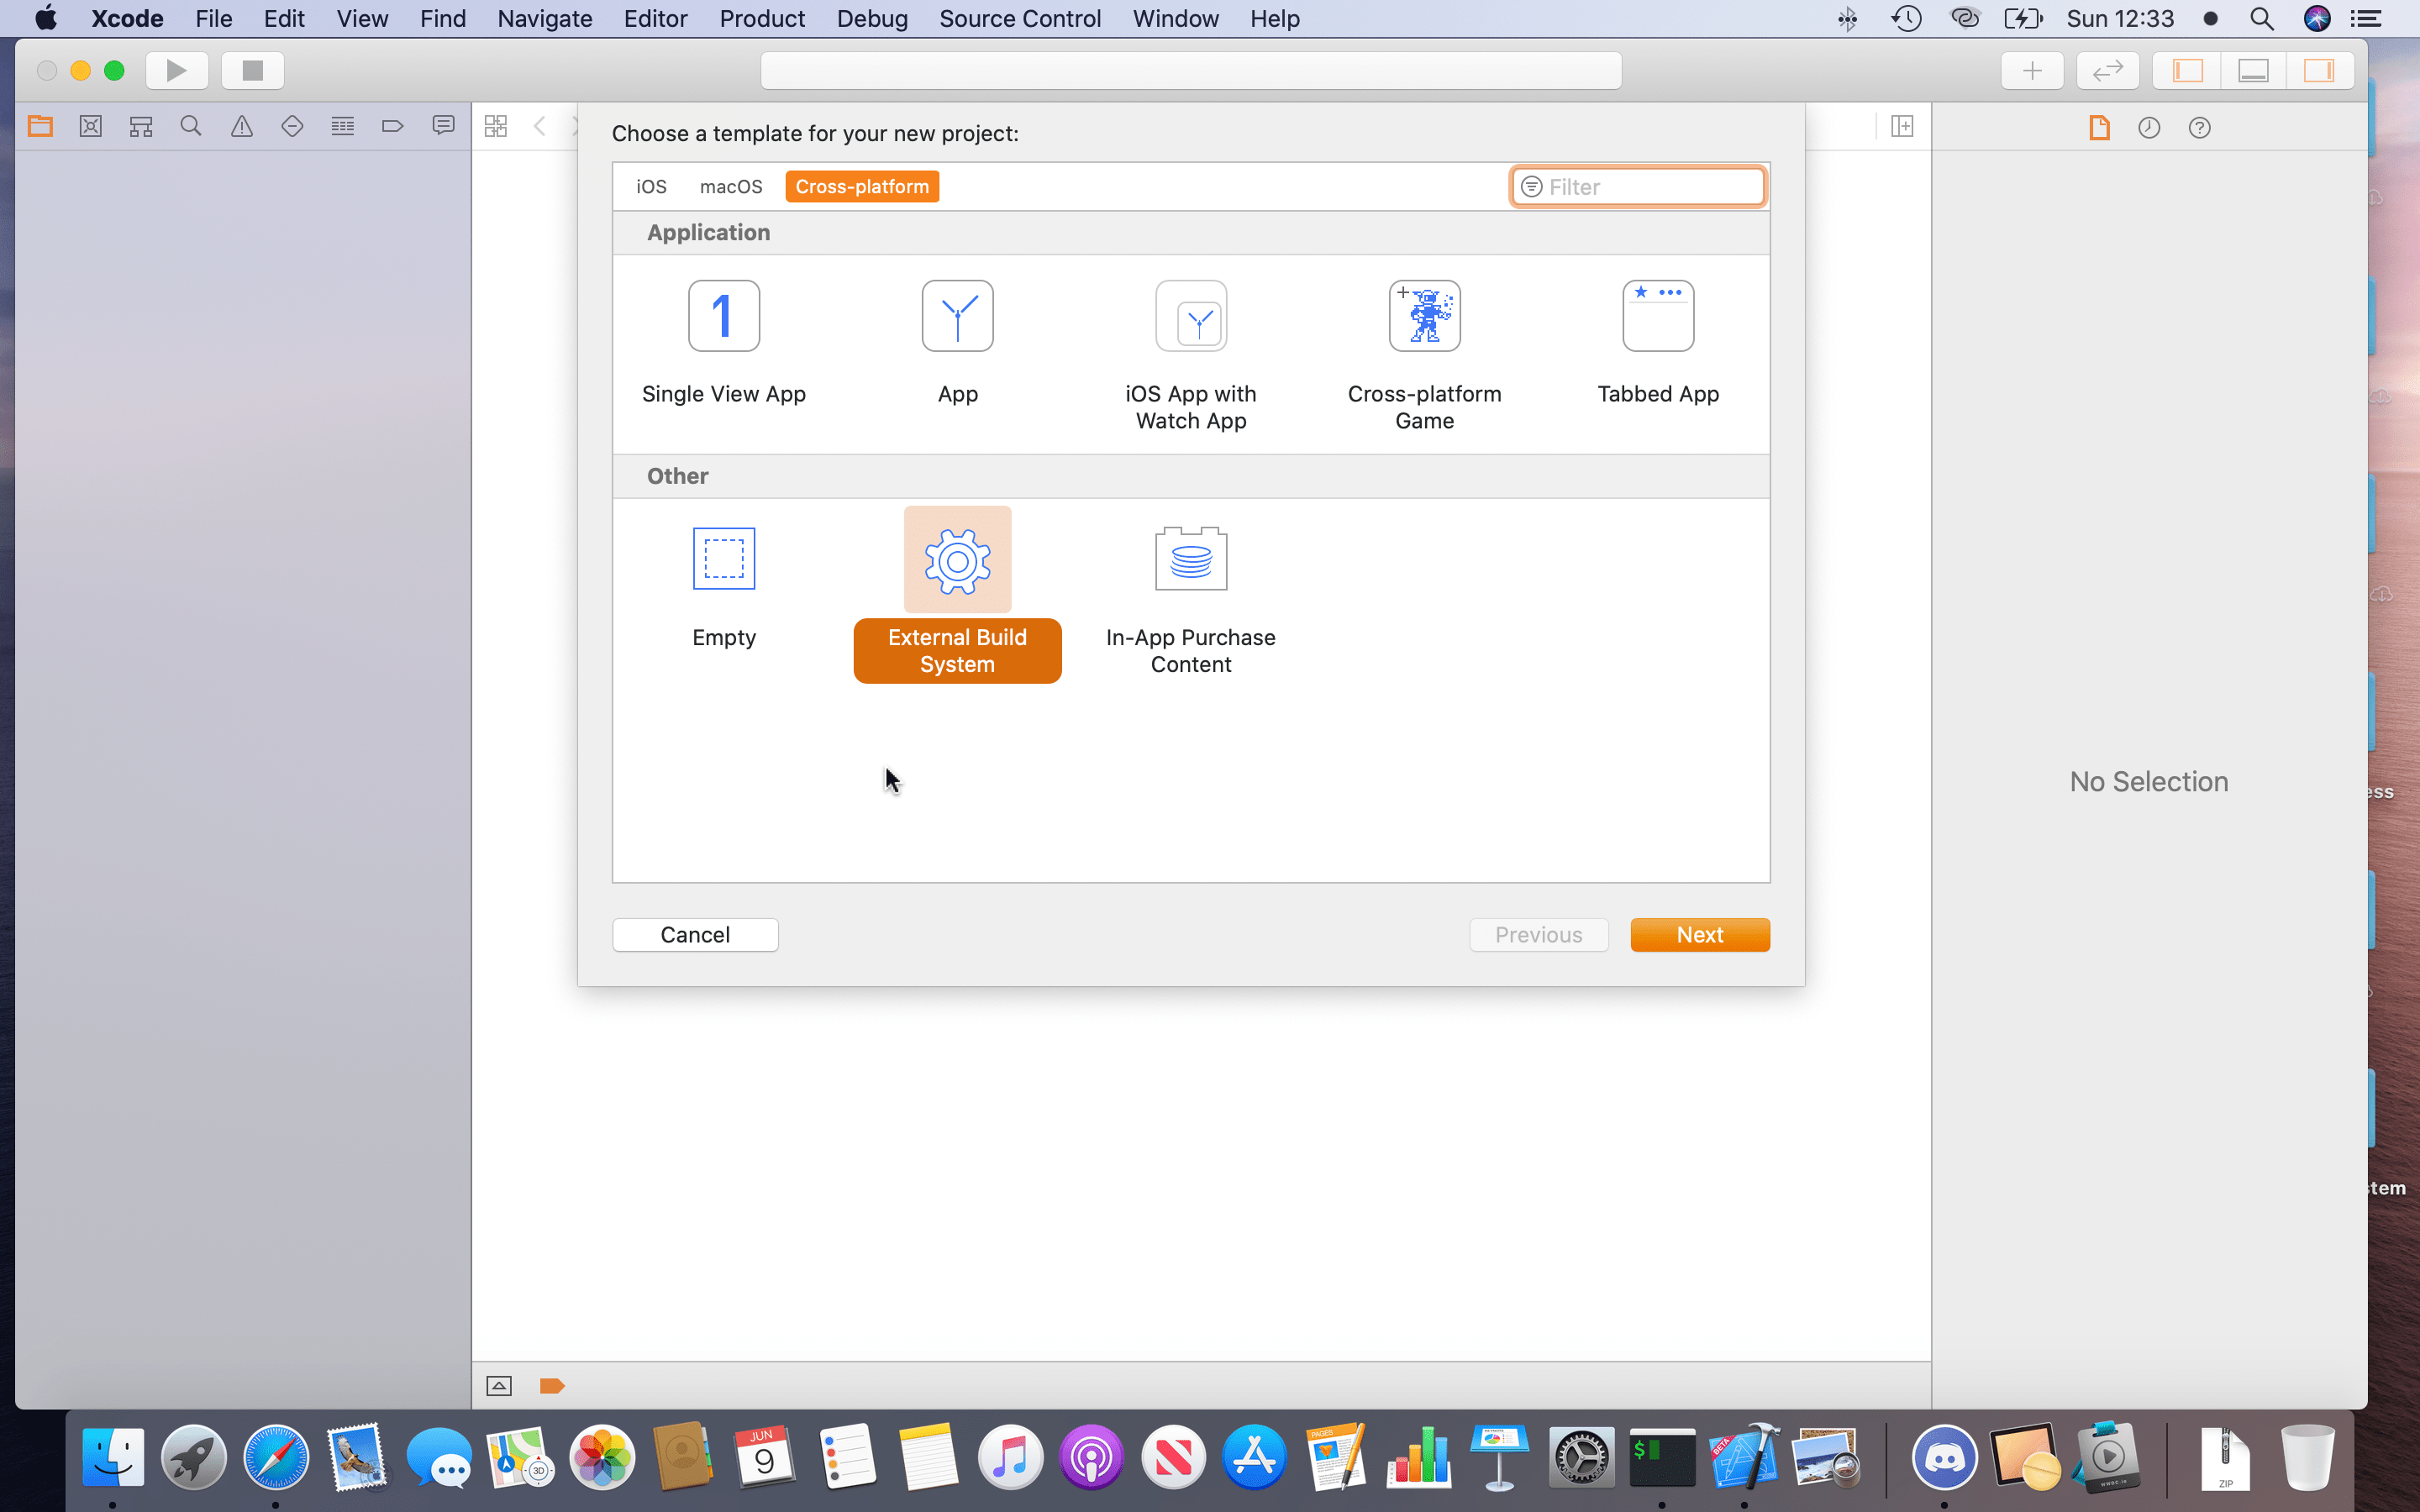
Next, search for the project type that indicates “External Build System”. If you are on Xcode 11, this is located in the Cross-platform section. This type of project will allow us to use Ren'Py as an external building tool to build and run a Ren'Py project.
On the next step in the wizard, you’ll need to specify typical Xcode details (though Ren'Py doesn’t acutually need to know any of it) as well as where Ren'Py is. In the Build Tool field, type the location of where renpy.sh is located. We’ll change this later so that you can swap it out quickly or let anyone else do that on their machine if you hand them the source code.
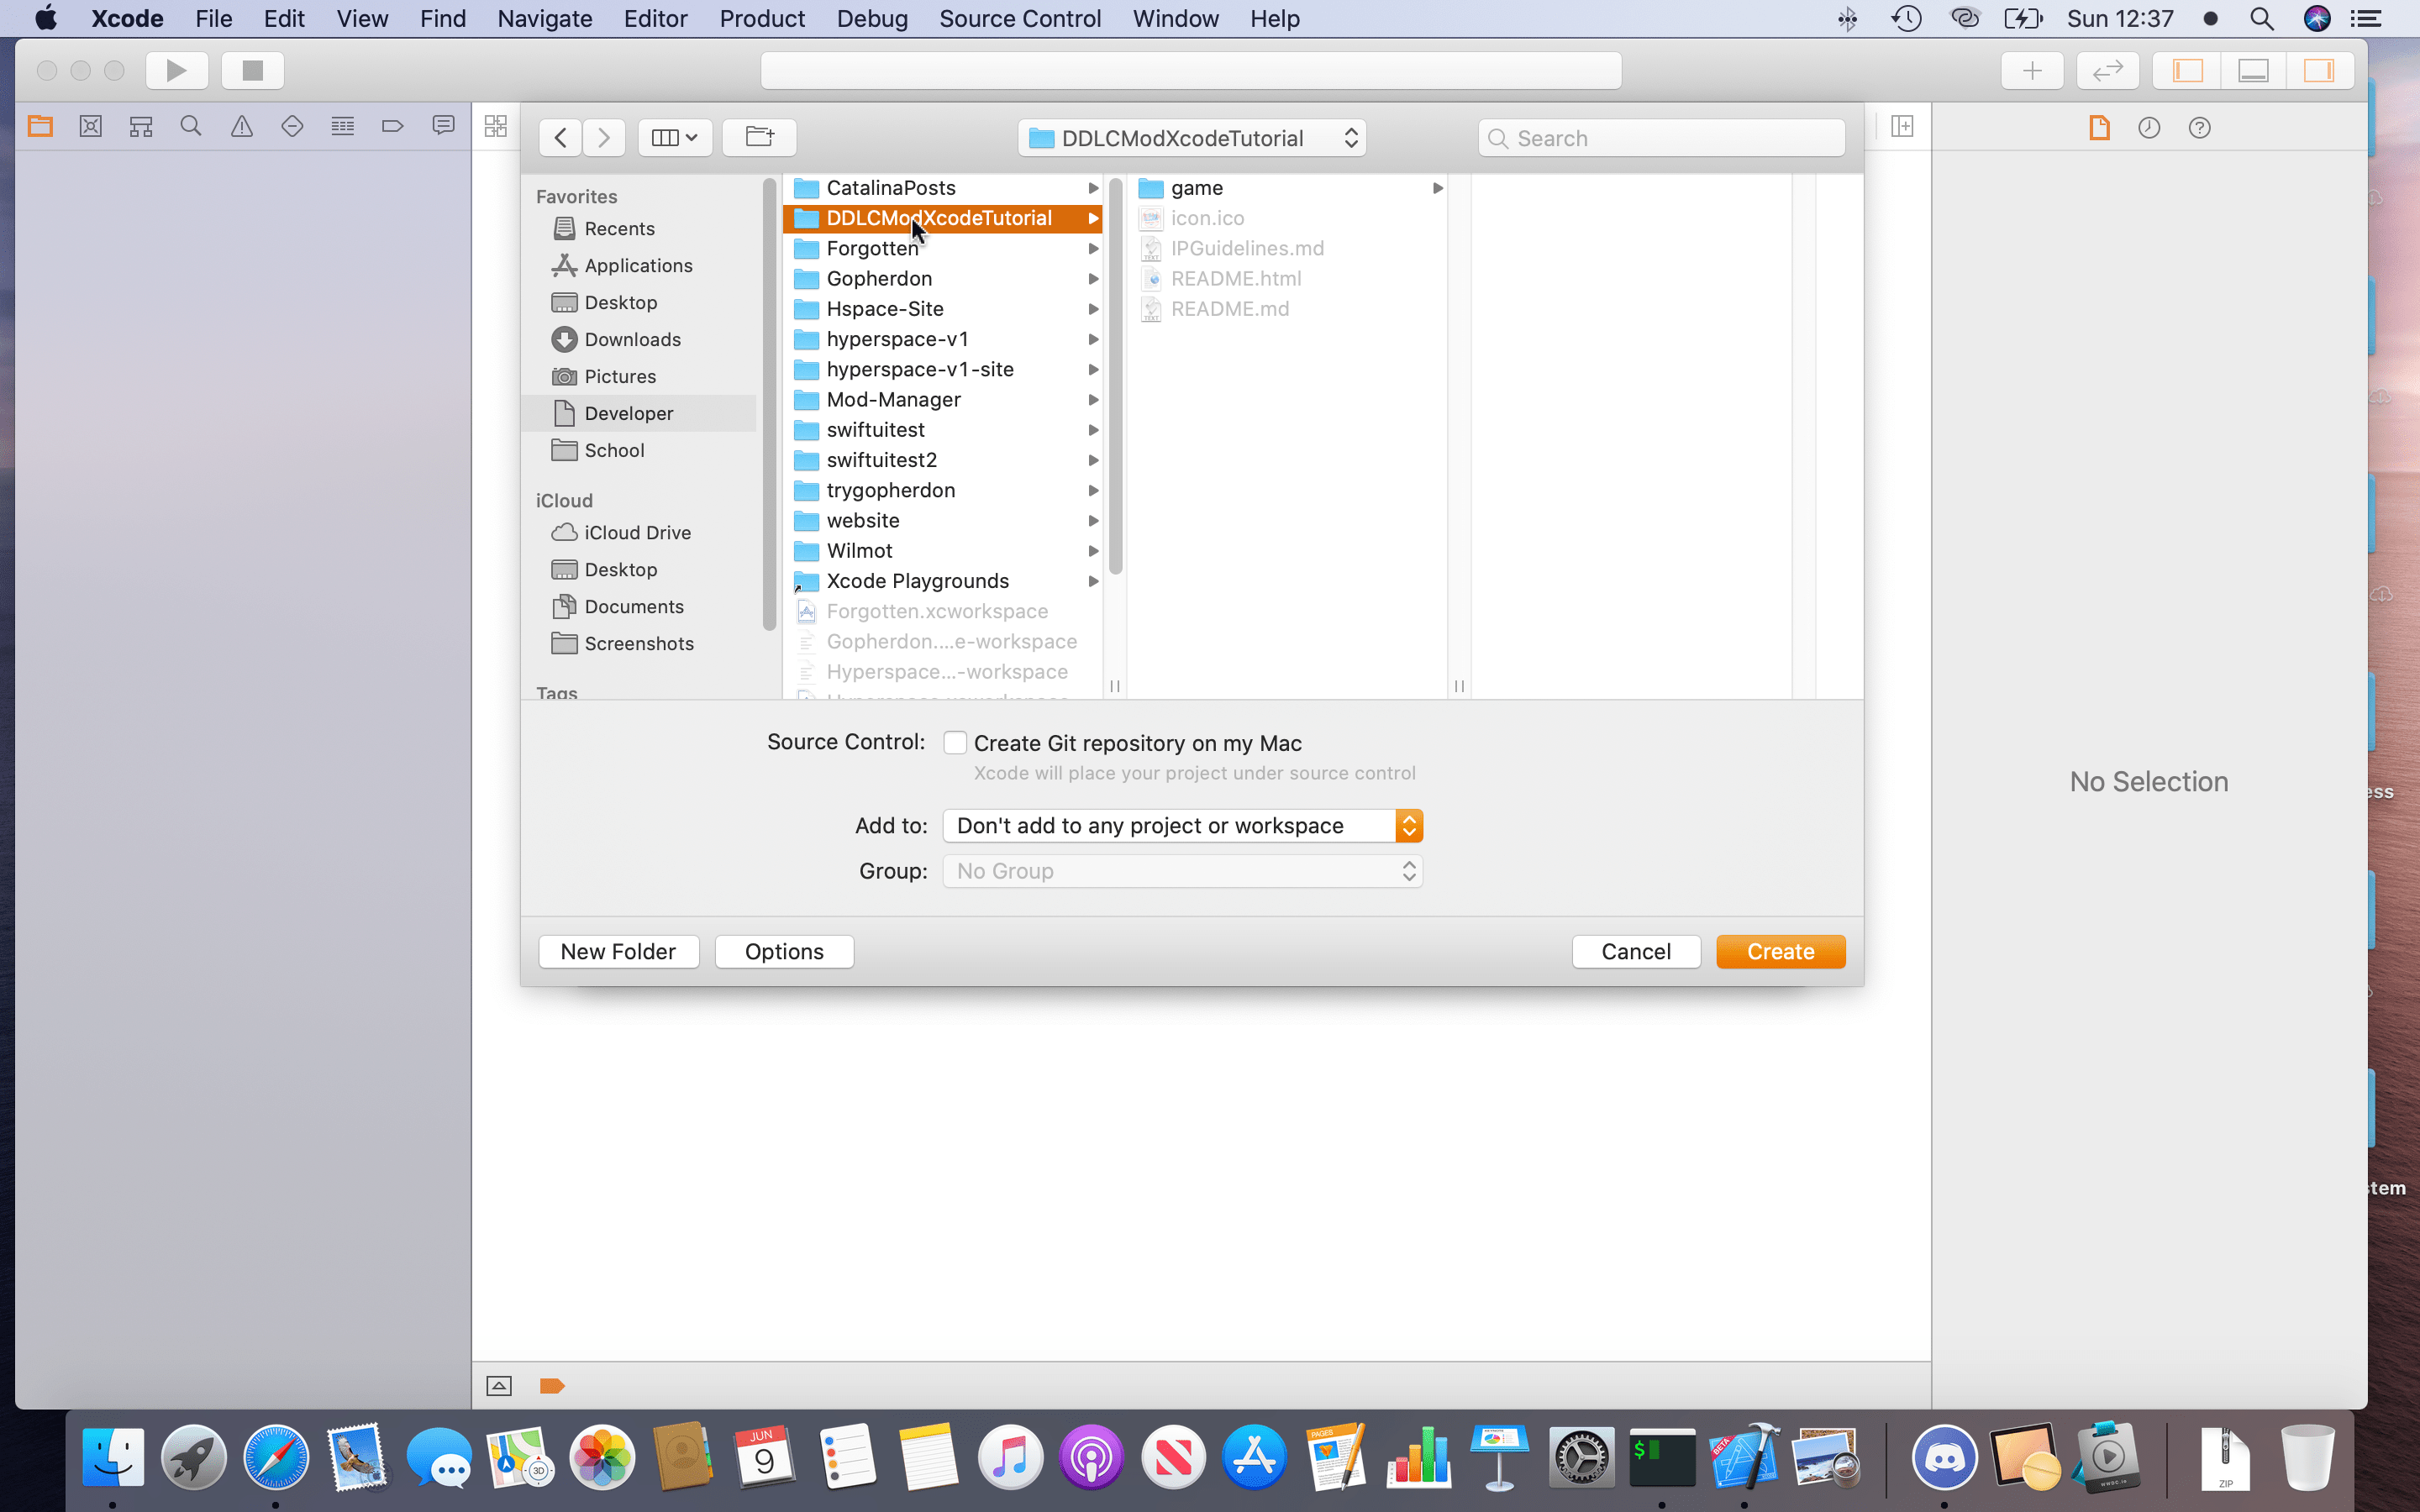
When you’re done, you can click Next to finalize the project. Navigate to where your project is located and save at the root of it.
You should see a new Xcode window ready with your project loaded. However, we’re not quite ready as we’ll need to shift contents around.
Rearranging and adding project files
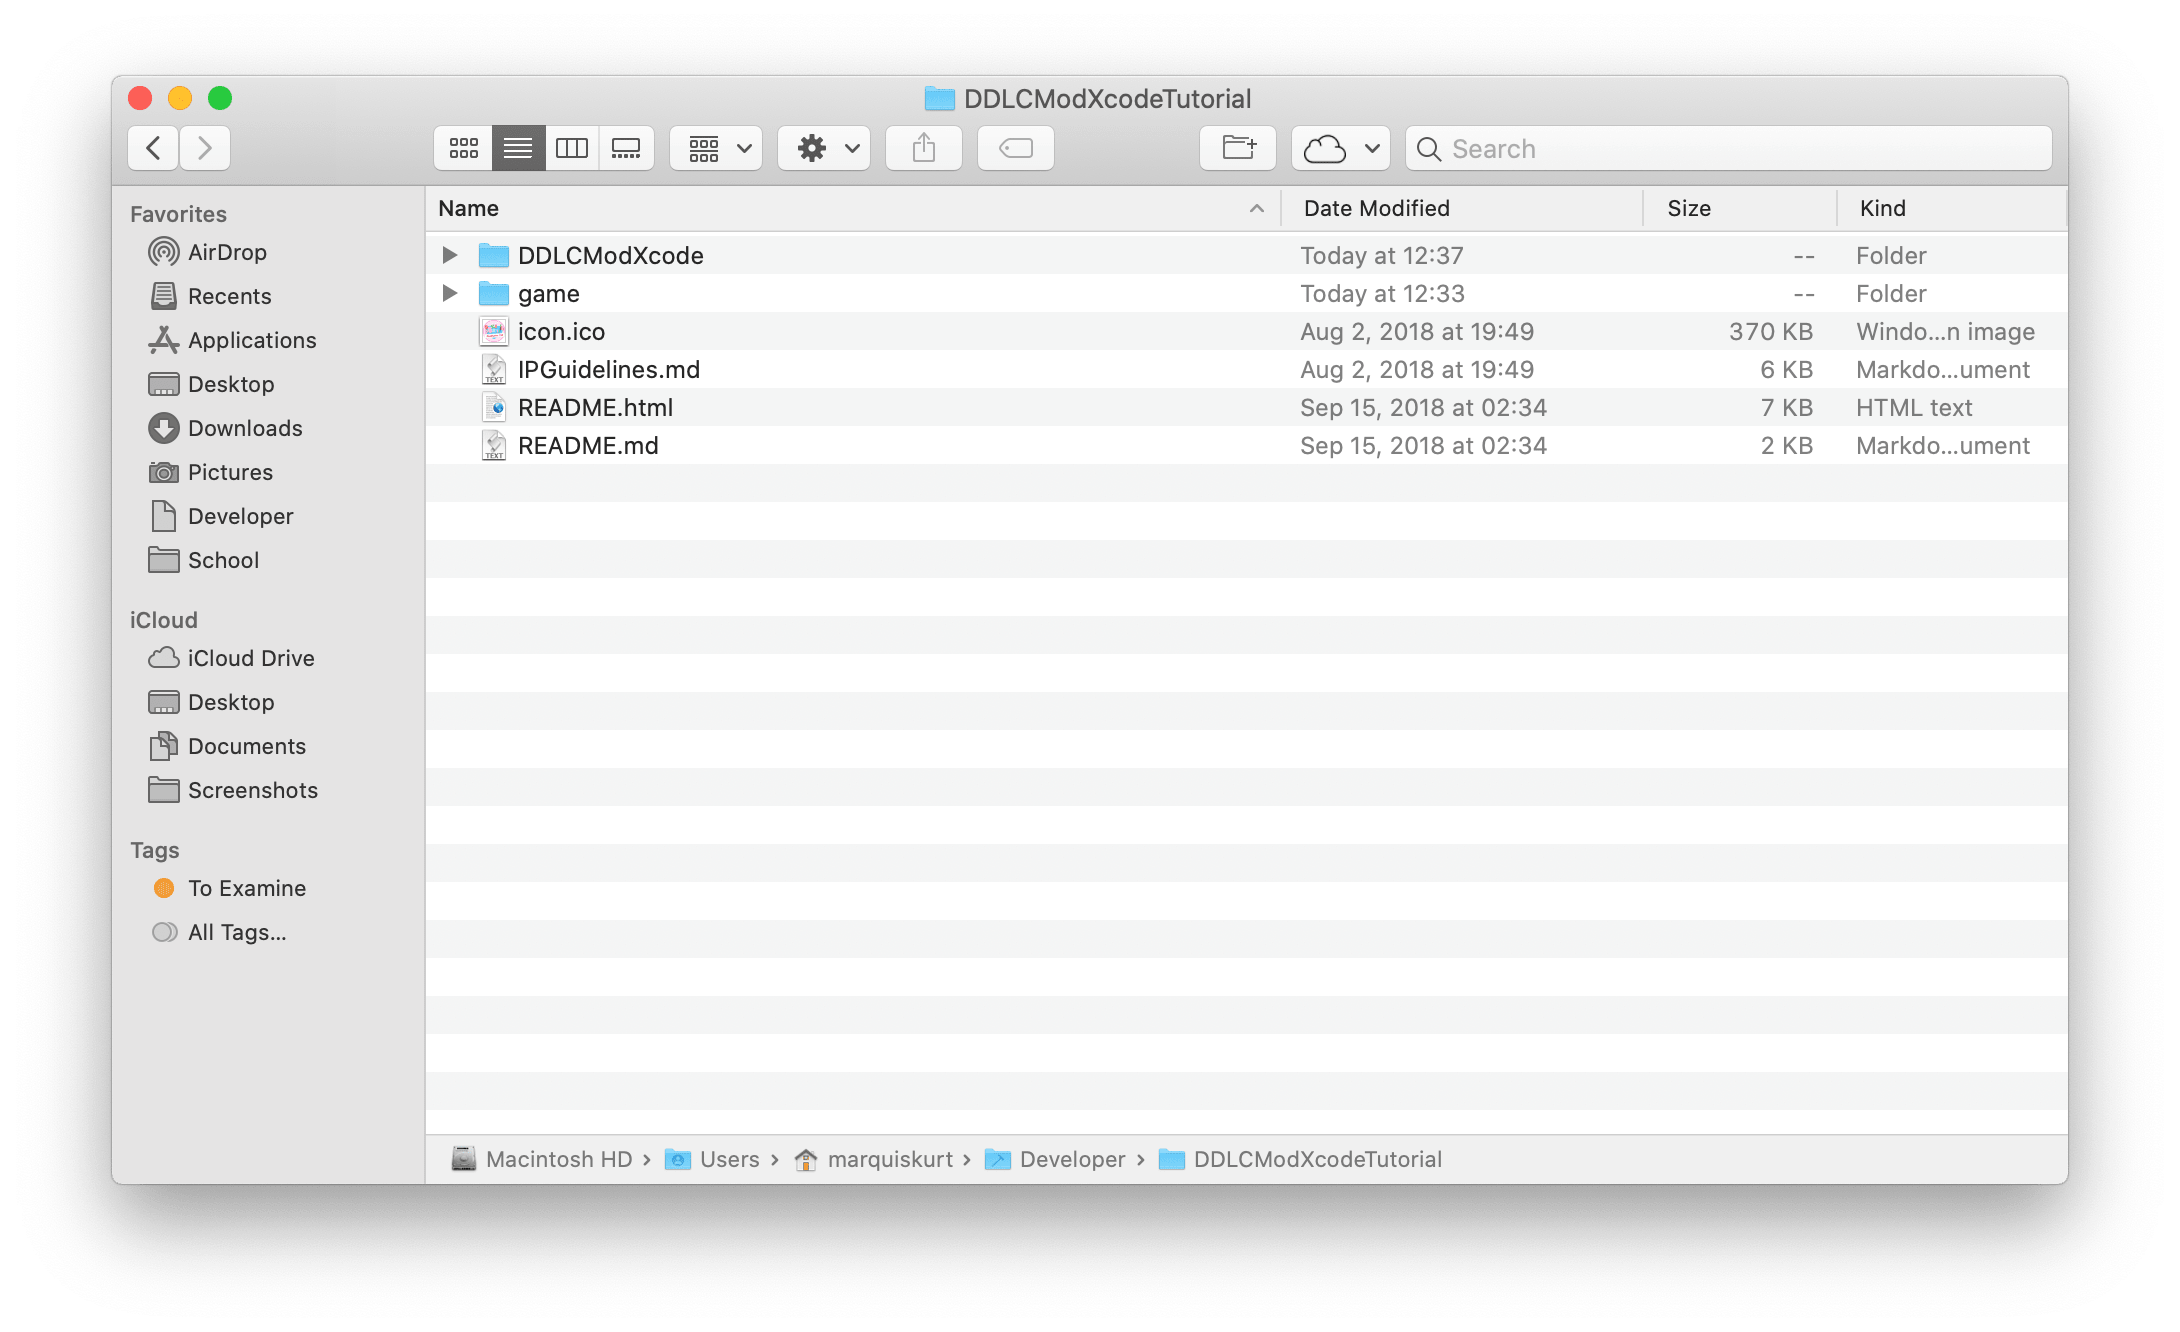
Typically, when you create a new Xcode project this way, the actual project file is located in a subdirectory, which can confuse Xcode when you specify run commands and all the like. So, we’re going to need to rearrange that and add our project files to Xcode. For now, you can close Xcode and navigate to your project’s folder in Finder.

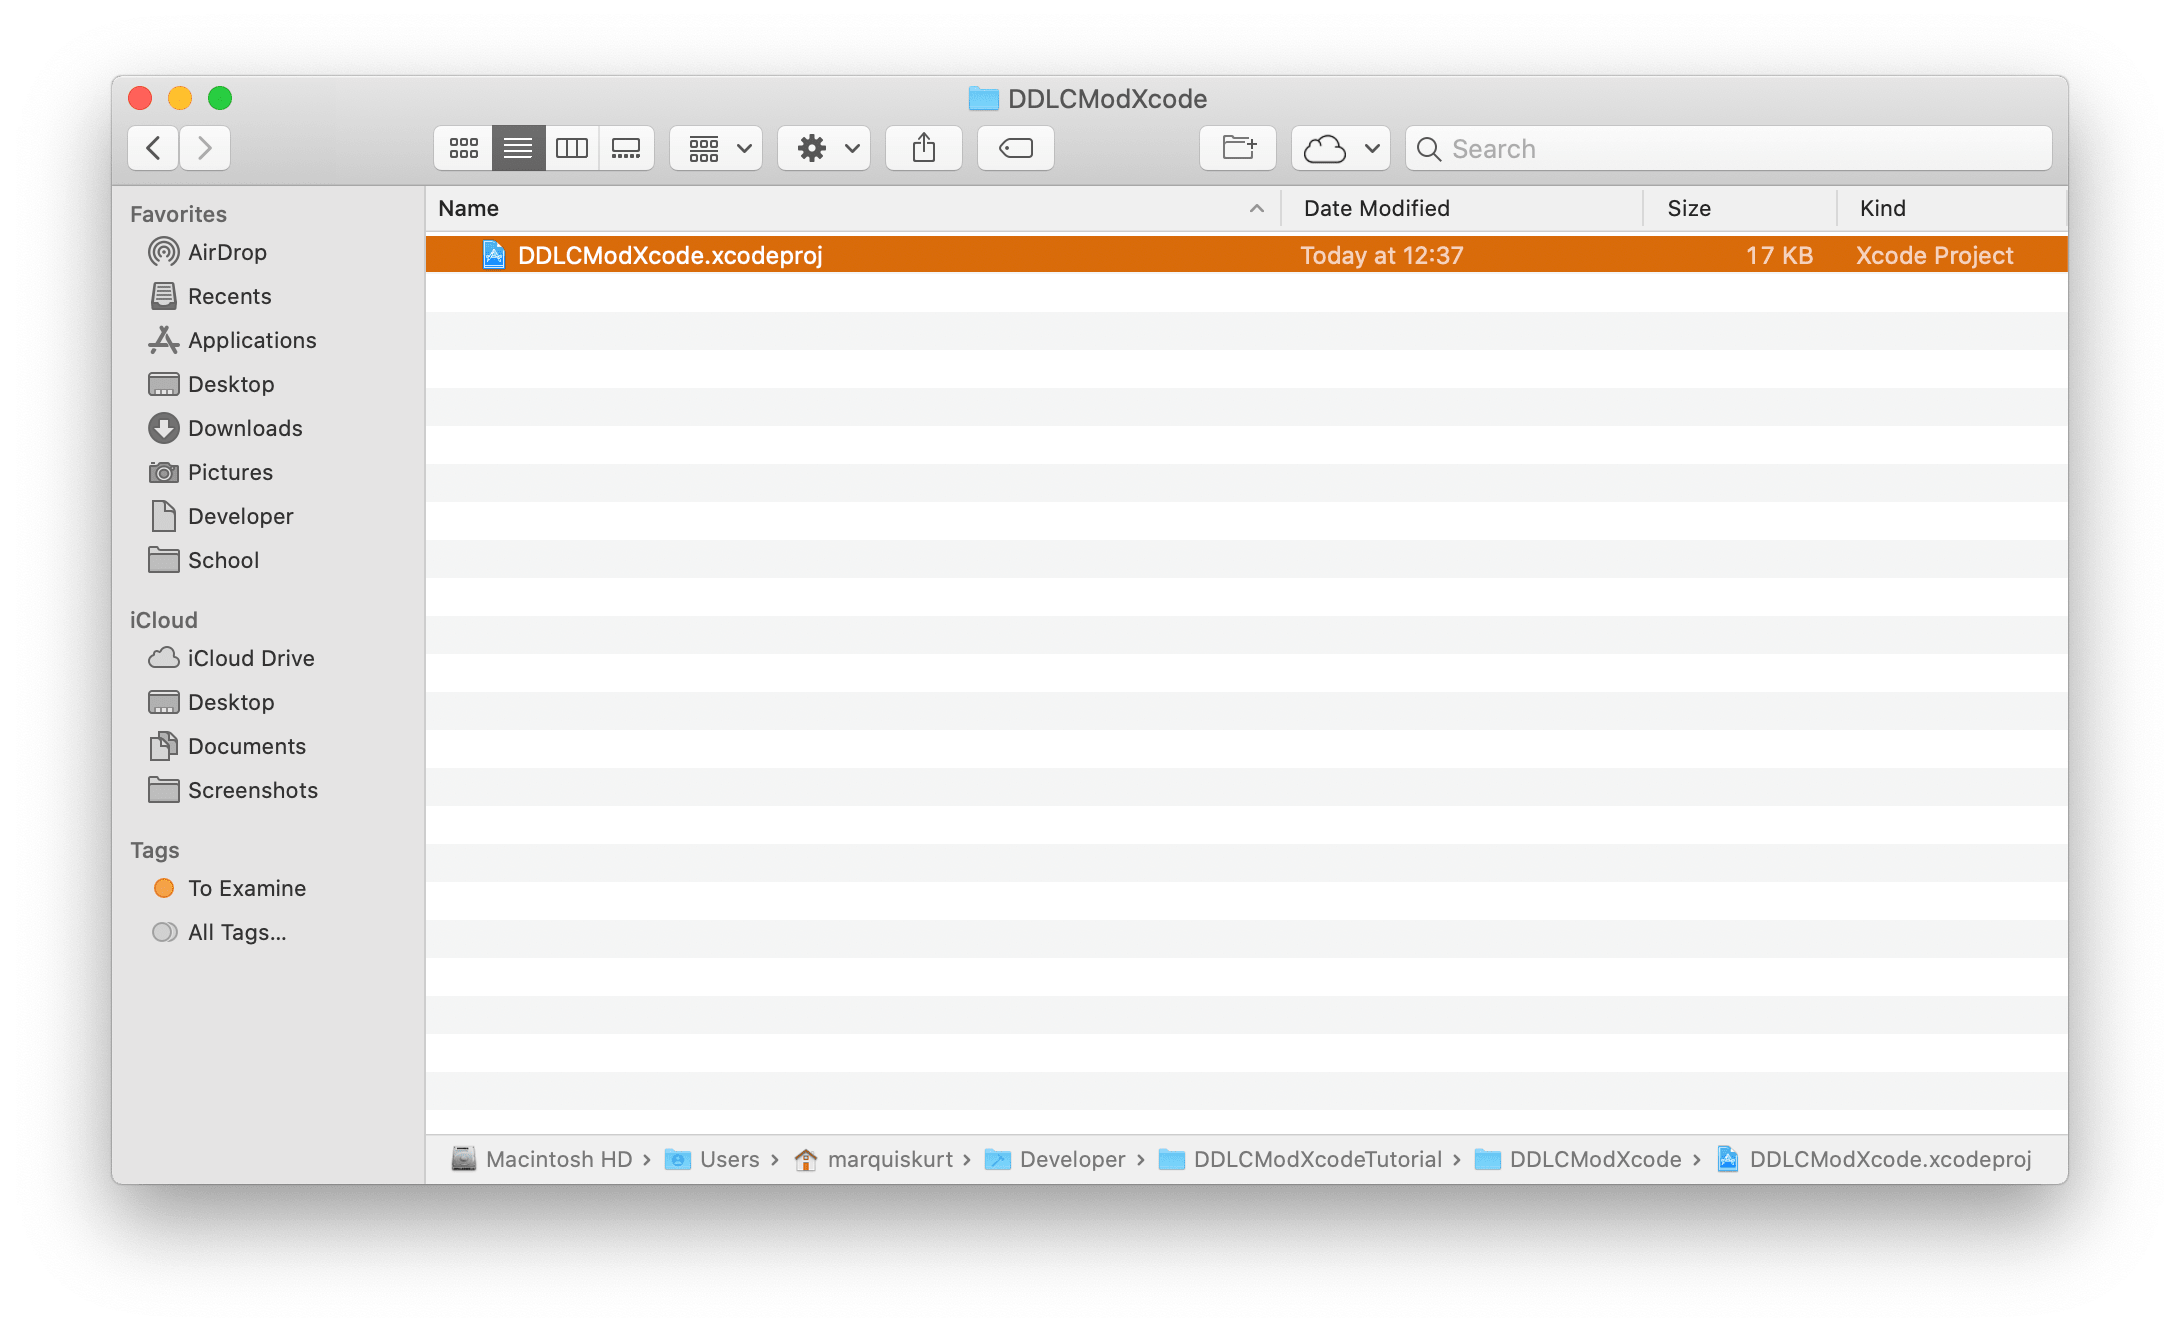
Head into the subdirectory that Xcode created and drag the Xcode project file out and into the root of your project.
Your project directory should look something like what’s below:
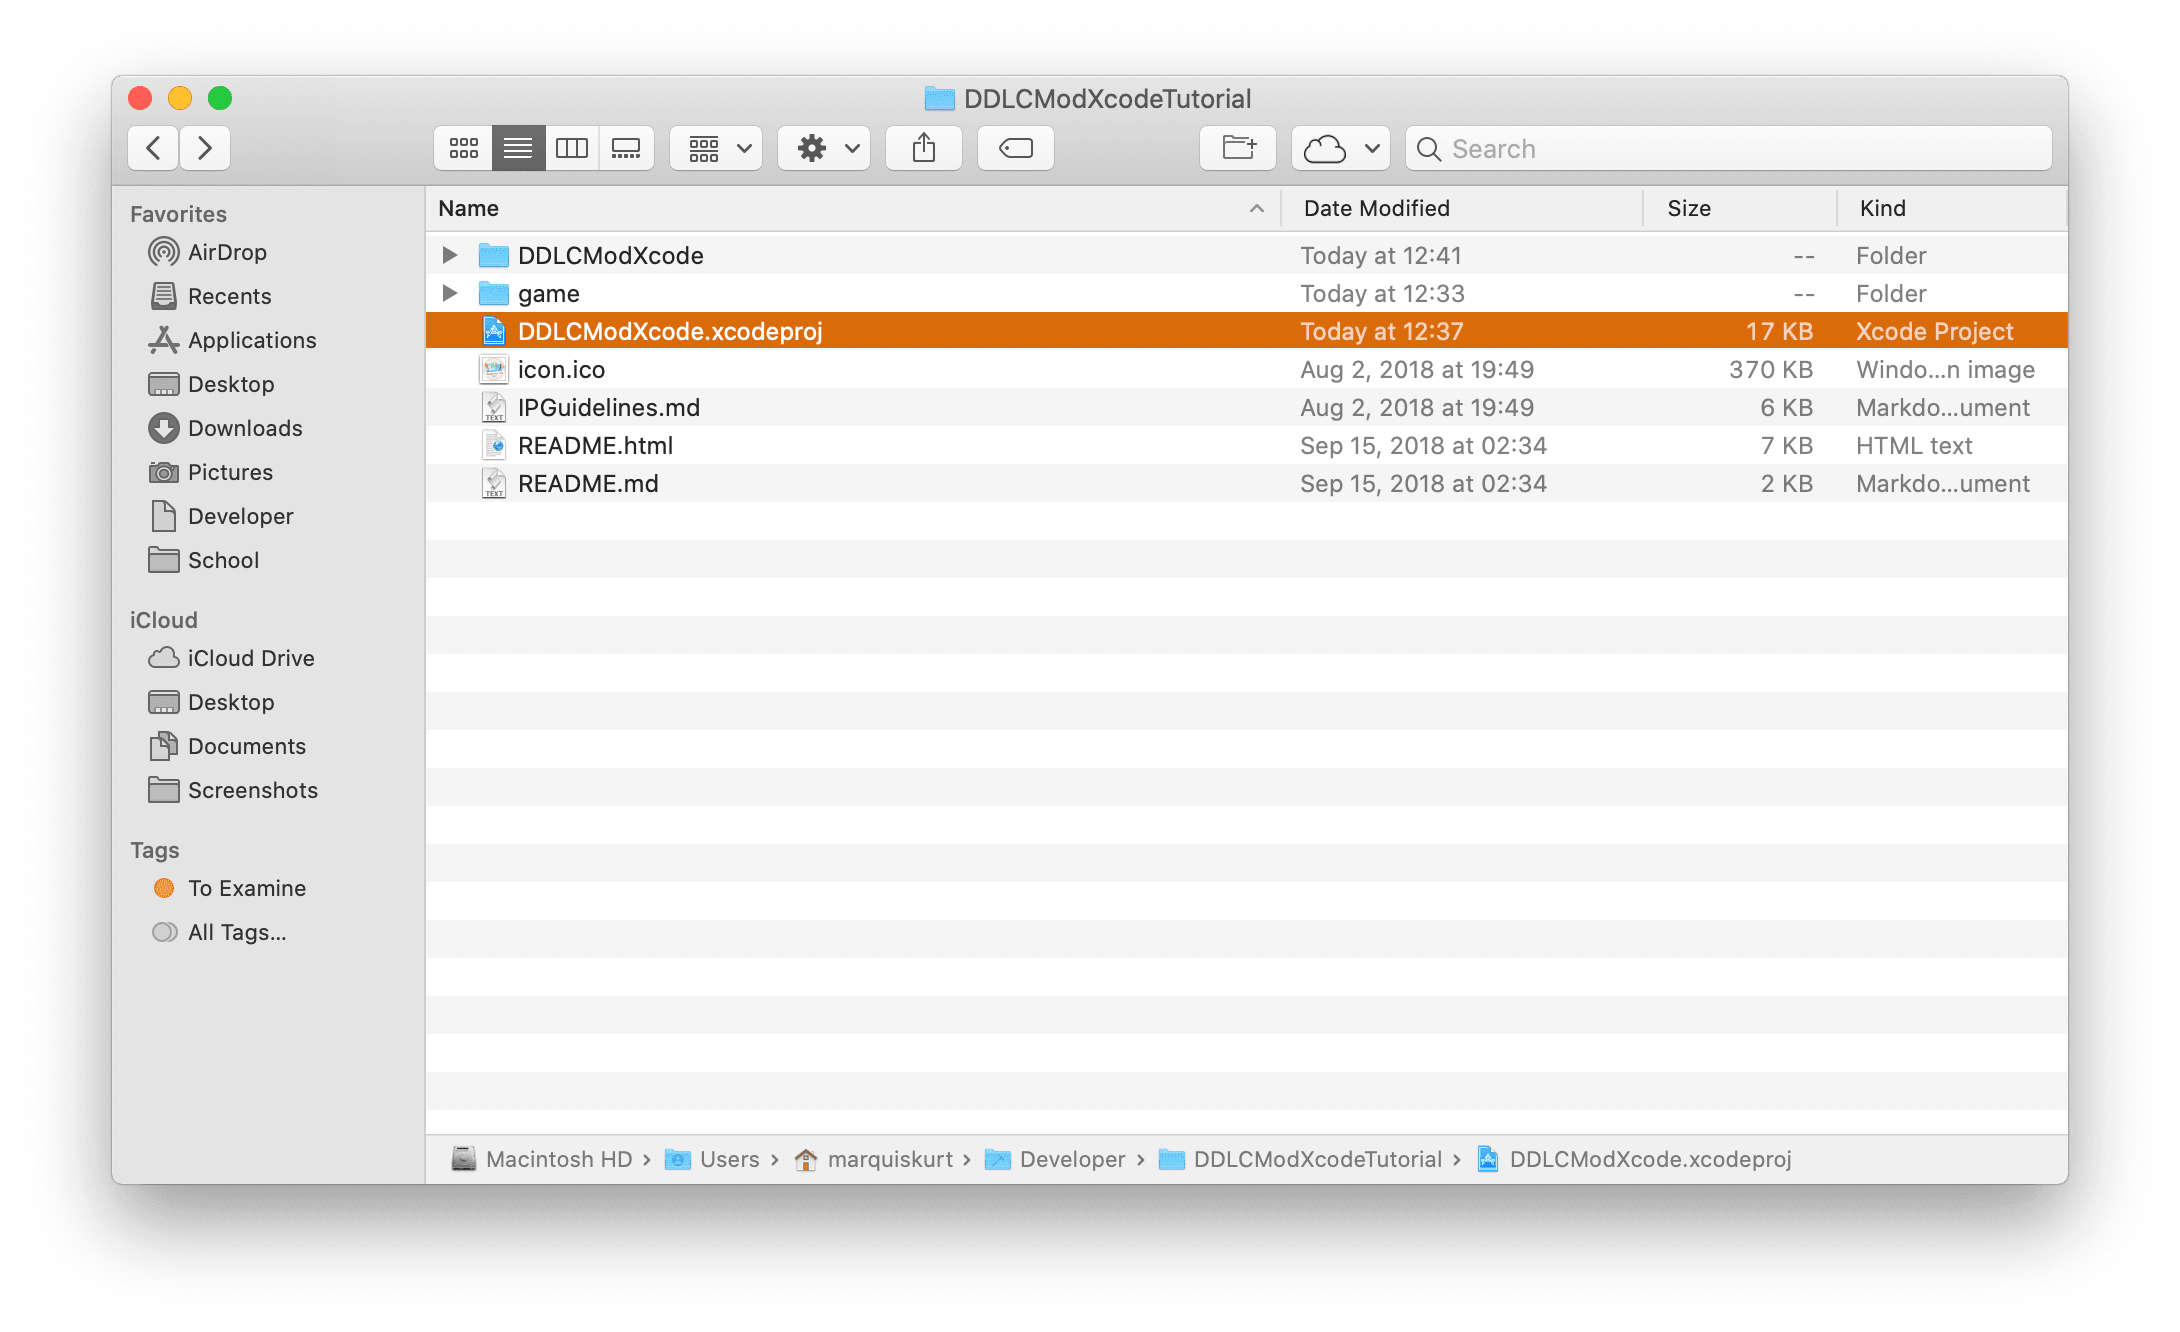
Now you can open up the Xcode project by double-clicking on that file. Xcode will open as you left it before.

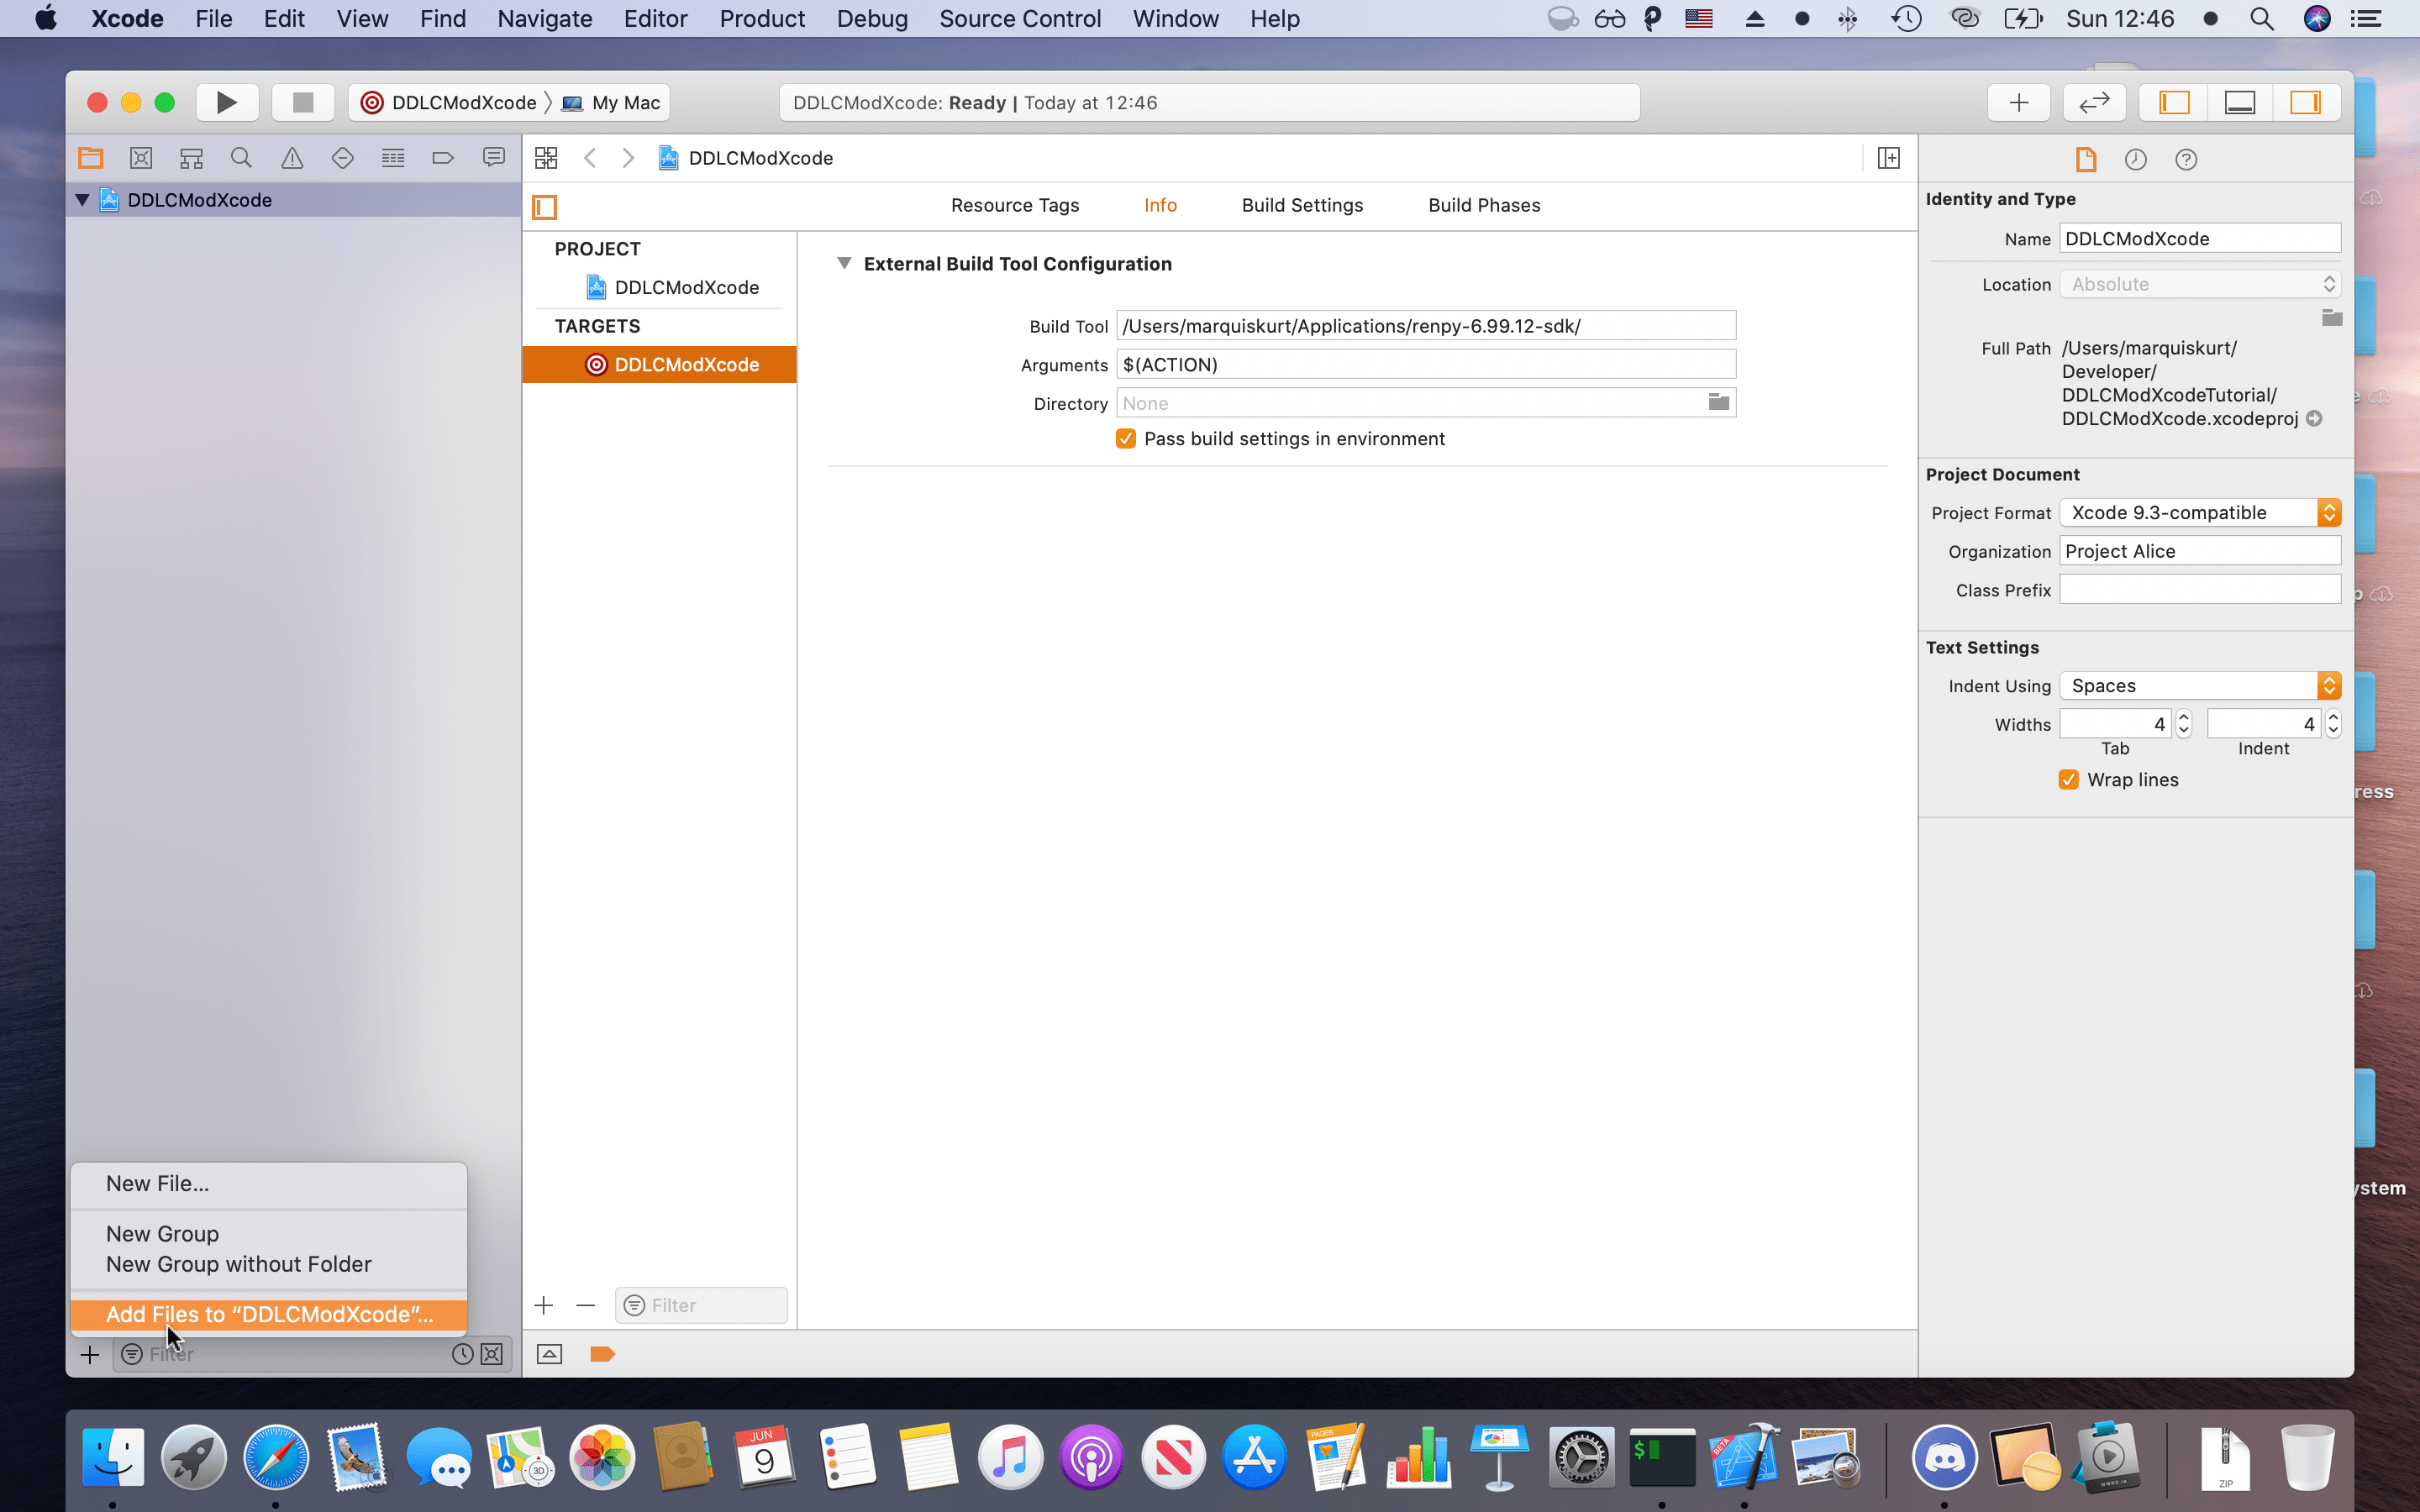
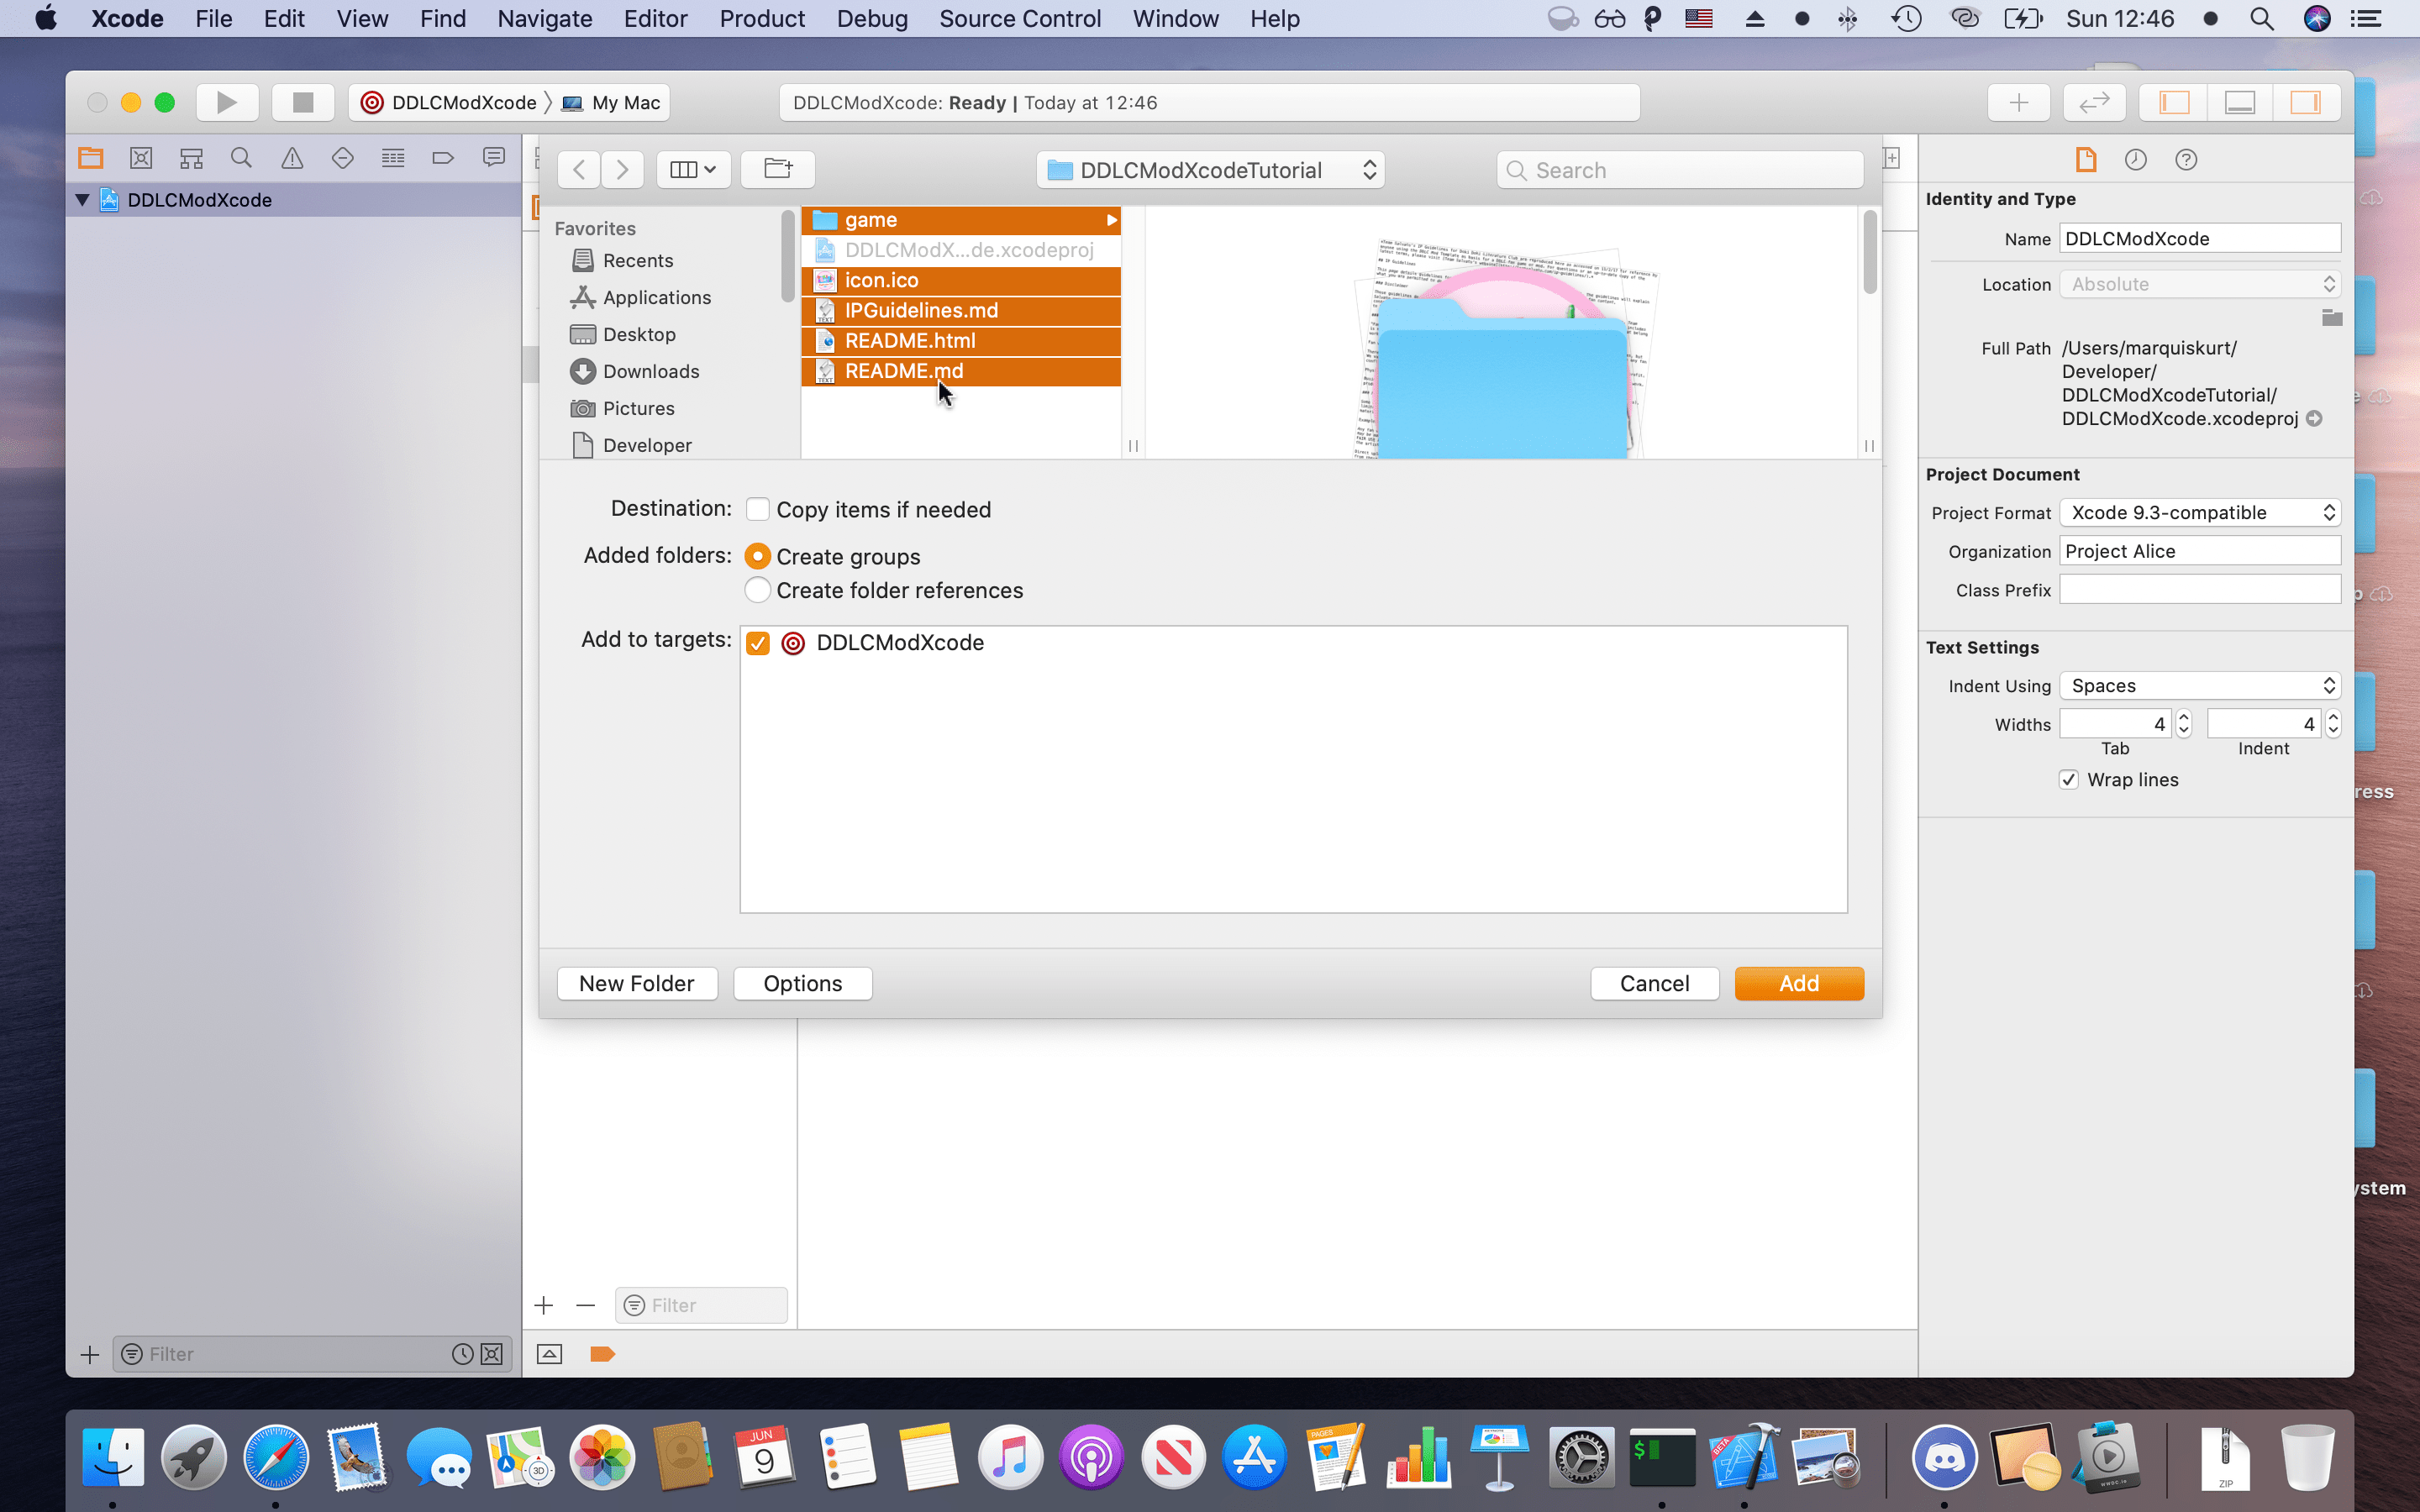
Now we need to add your Ren'Py project files. Click the Plus icon in the bottom left and select “Ad Files…”, then select all of the project files available. Make sure you untick “Copy items if needed”!

Now your files should appear in the left-hand side of the IDE, where your project files for any Xcode project are located.
Adding Build and Run support
Build support (well, technically linting)
The most difficult but fun part of making this Xcode project work is adding the build/run support. To make the process a bit easier, I decided to use an Xcode configuration file to handle certain build variables for me, though you can add these into the proper fields in your project settings, if you like.
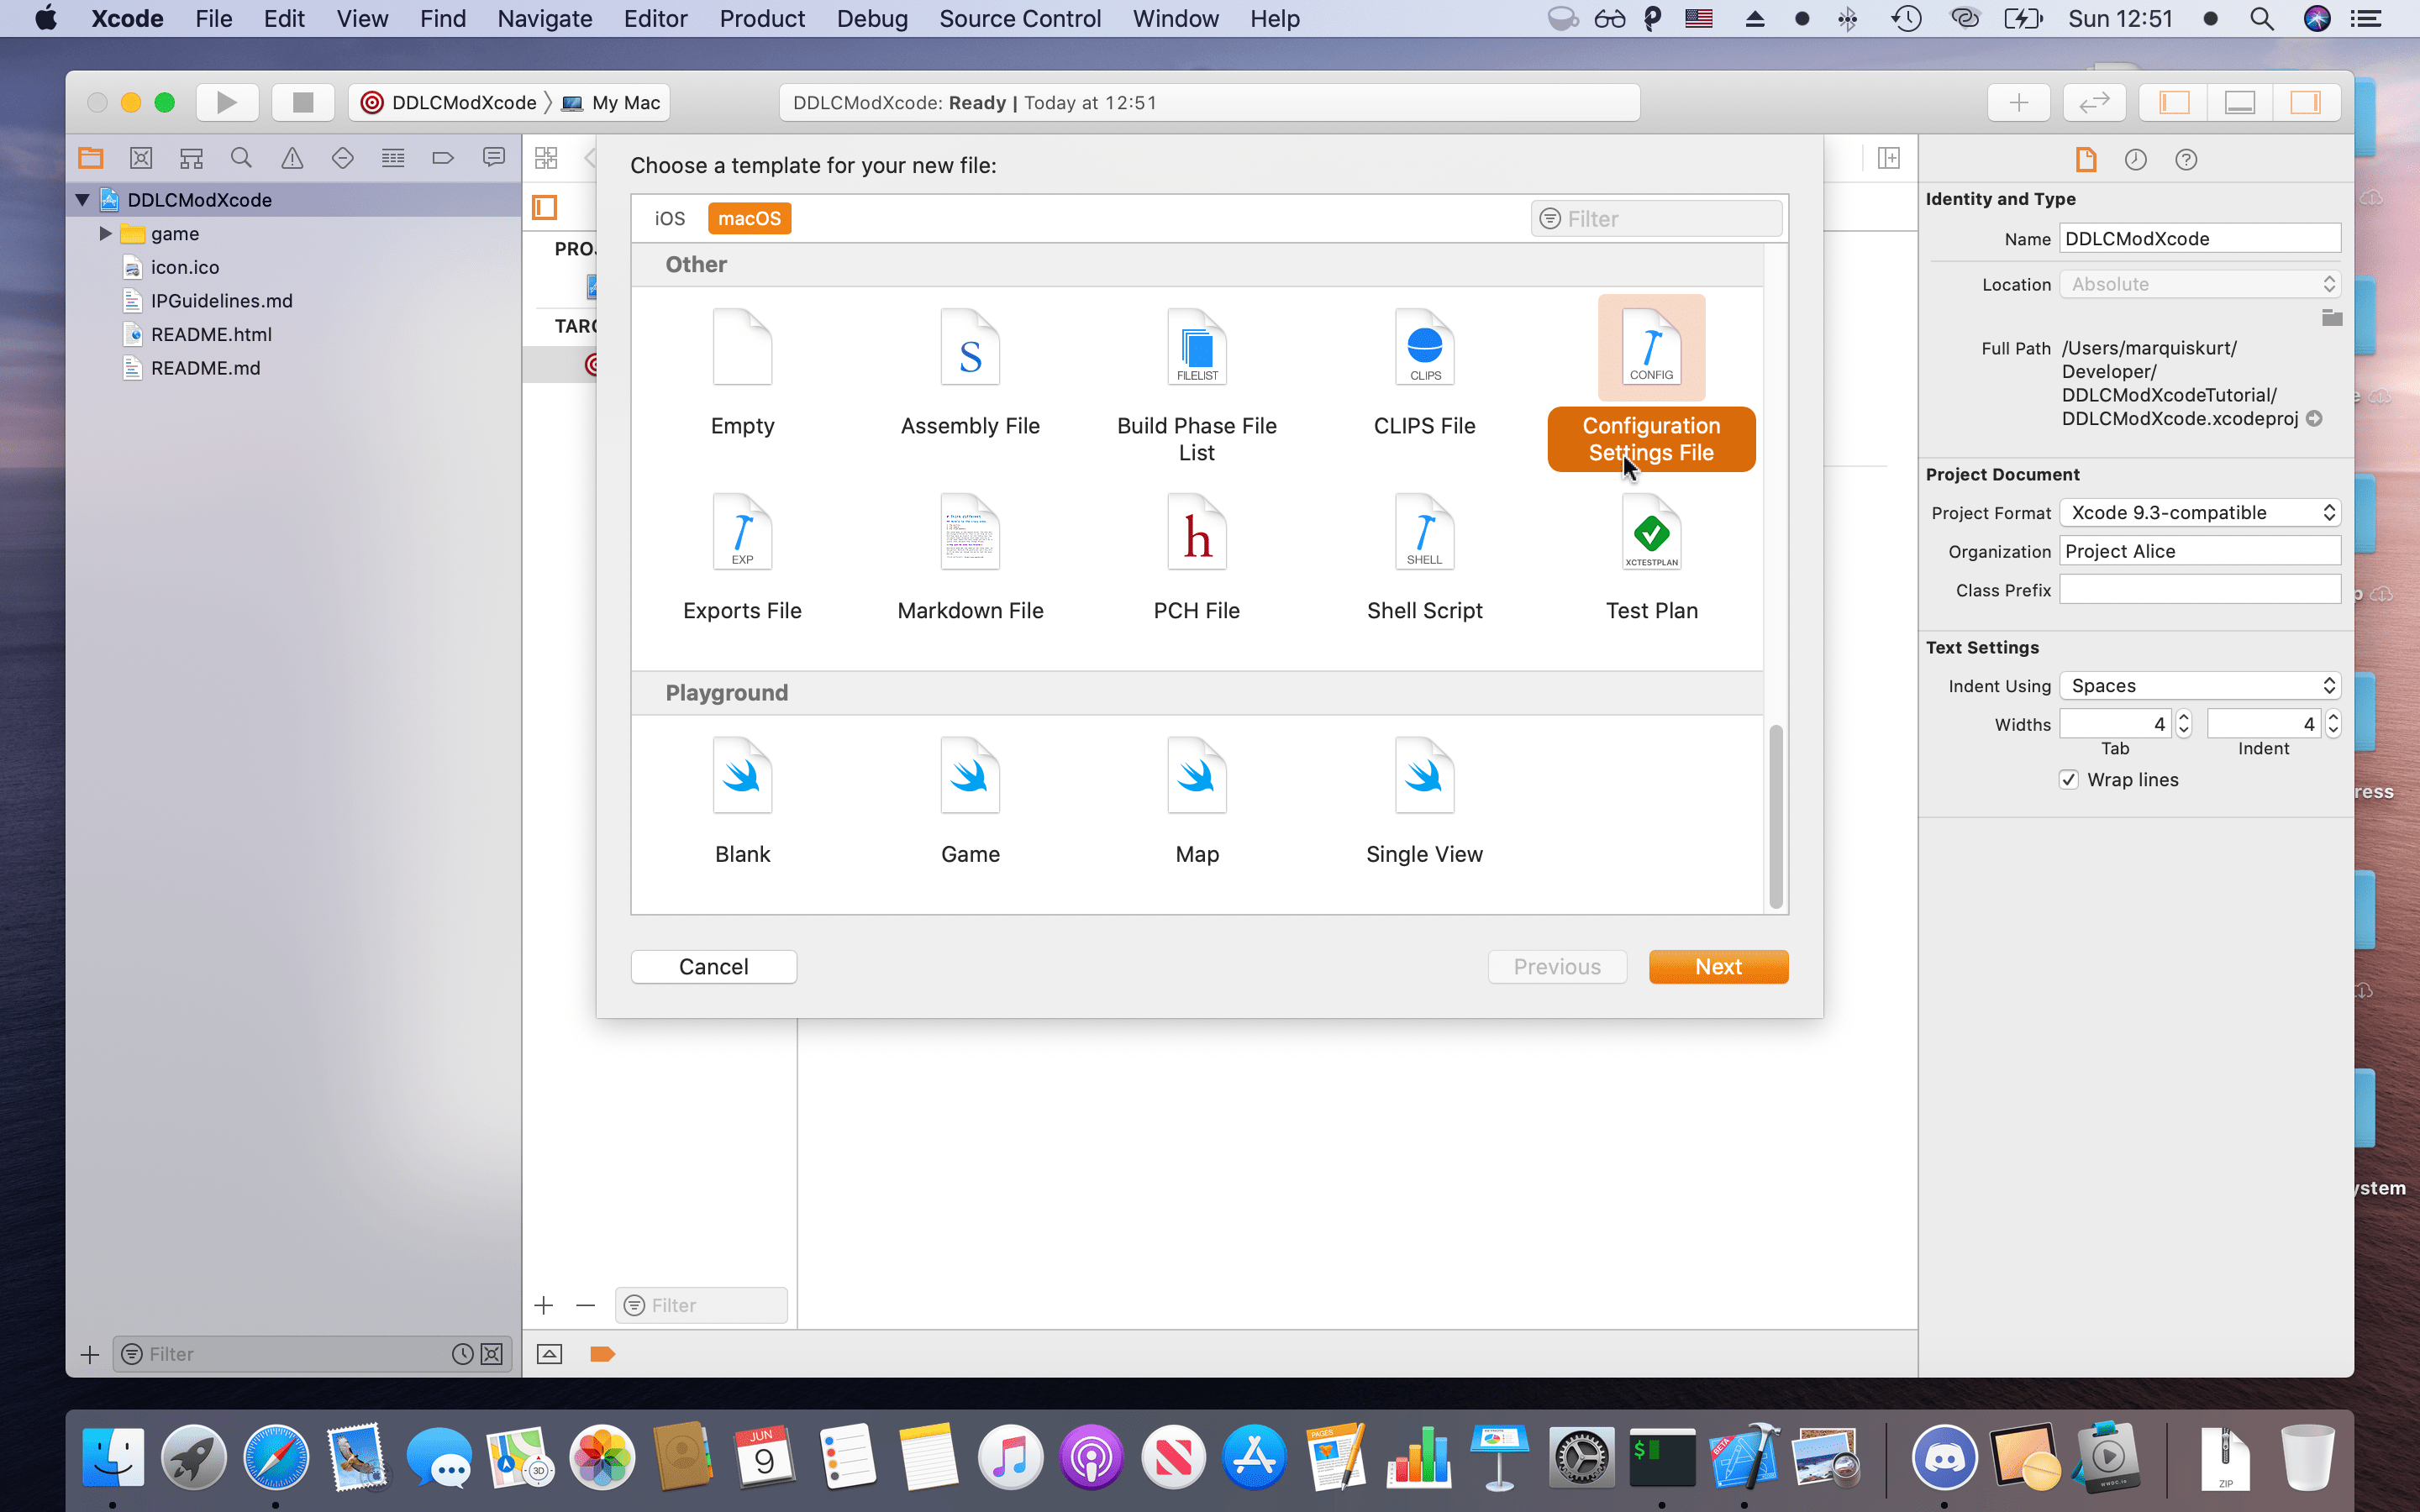
First, let’s start by creating a new Xcode configuration file. Click the plus icon again and select “New file” and then select the type as “Configuration Settings file”. Since I won’t be adding new config files, I left everything at the default settings, including name and location.

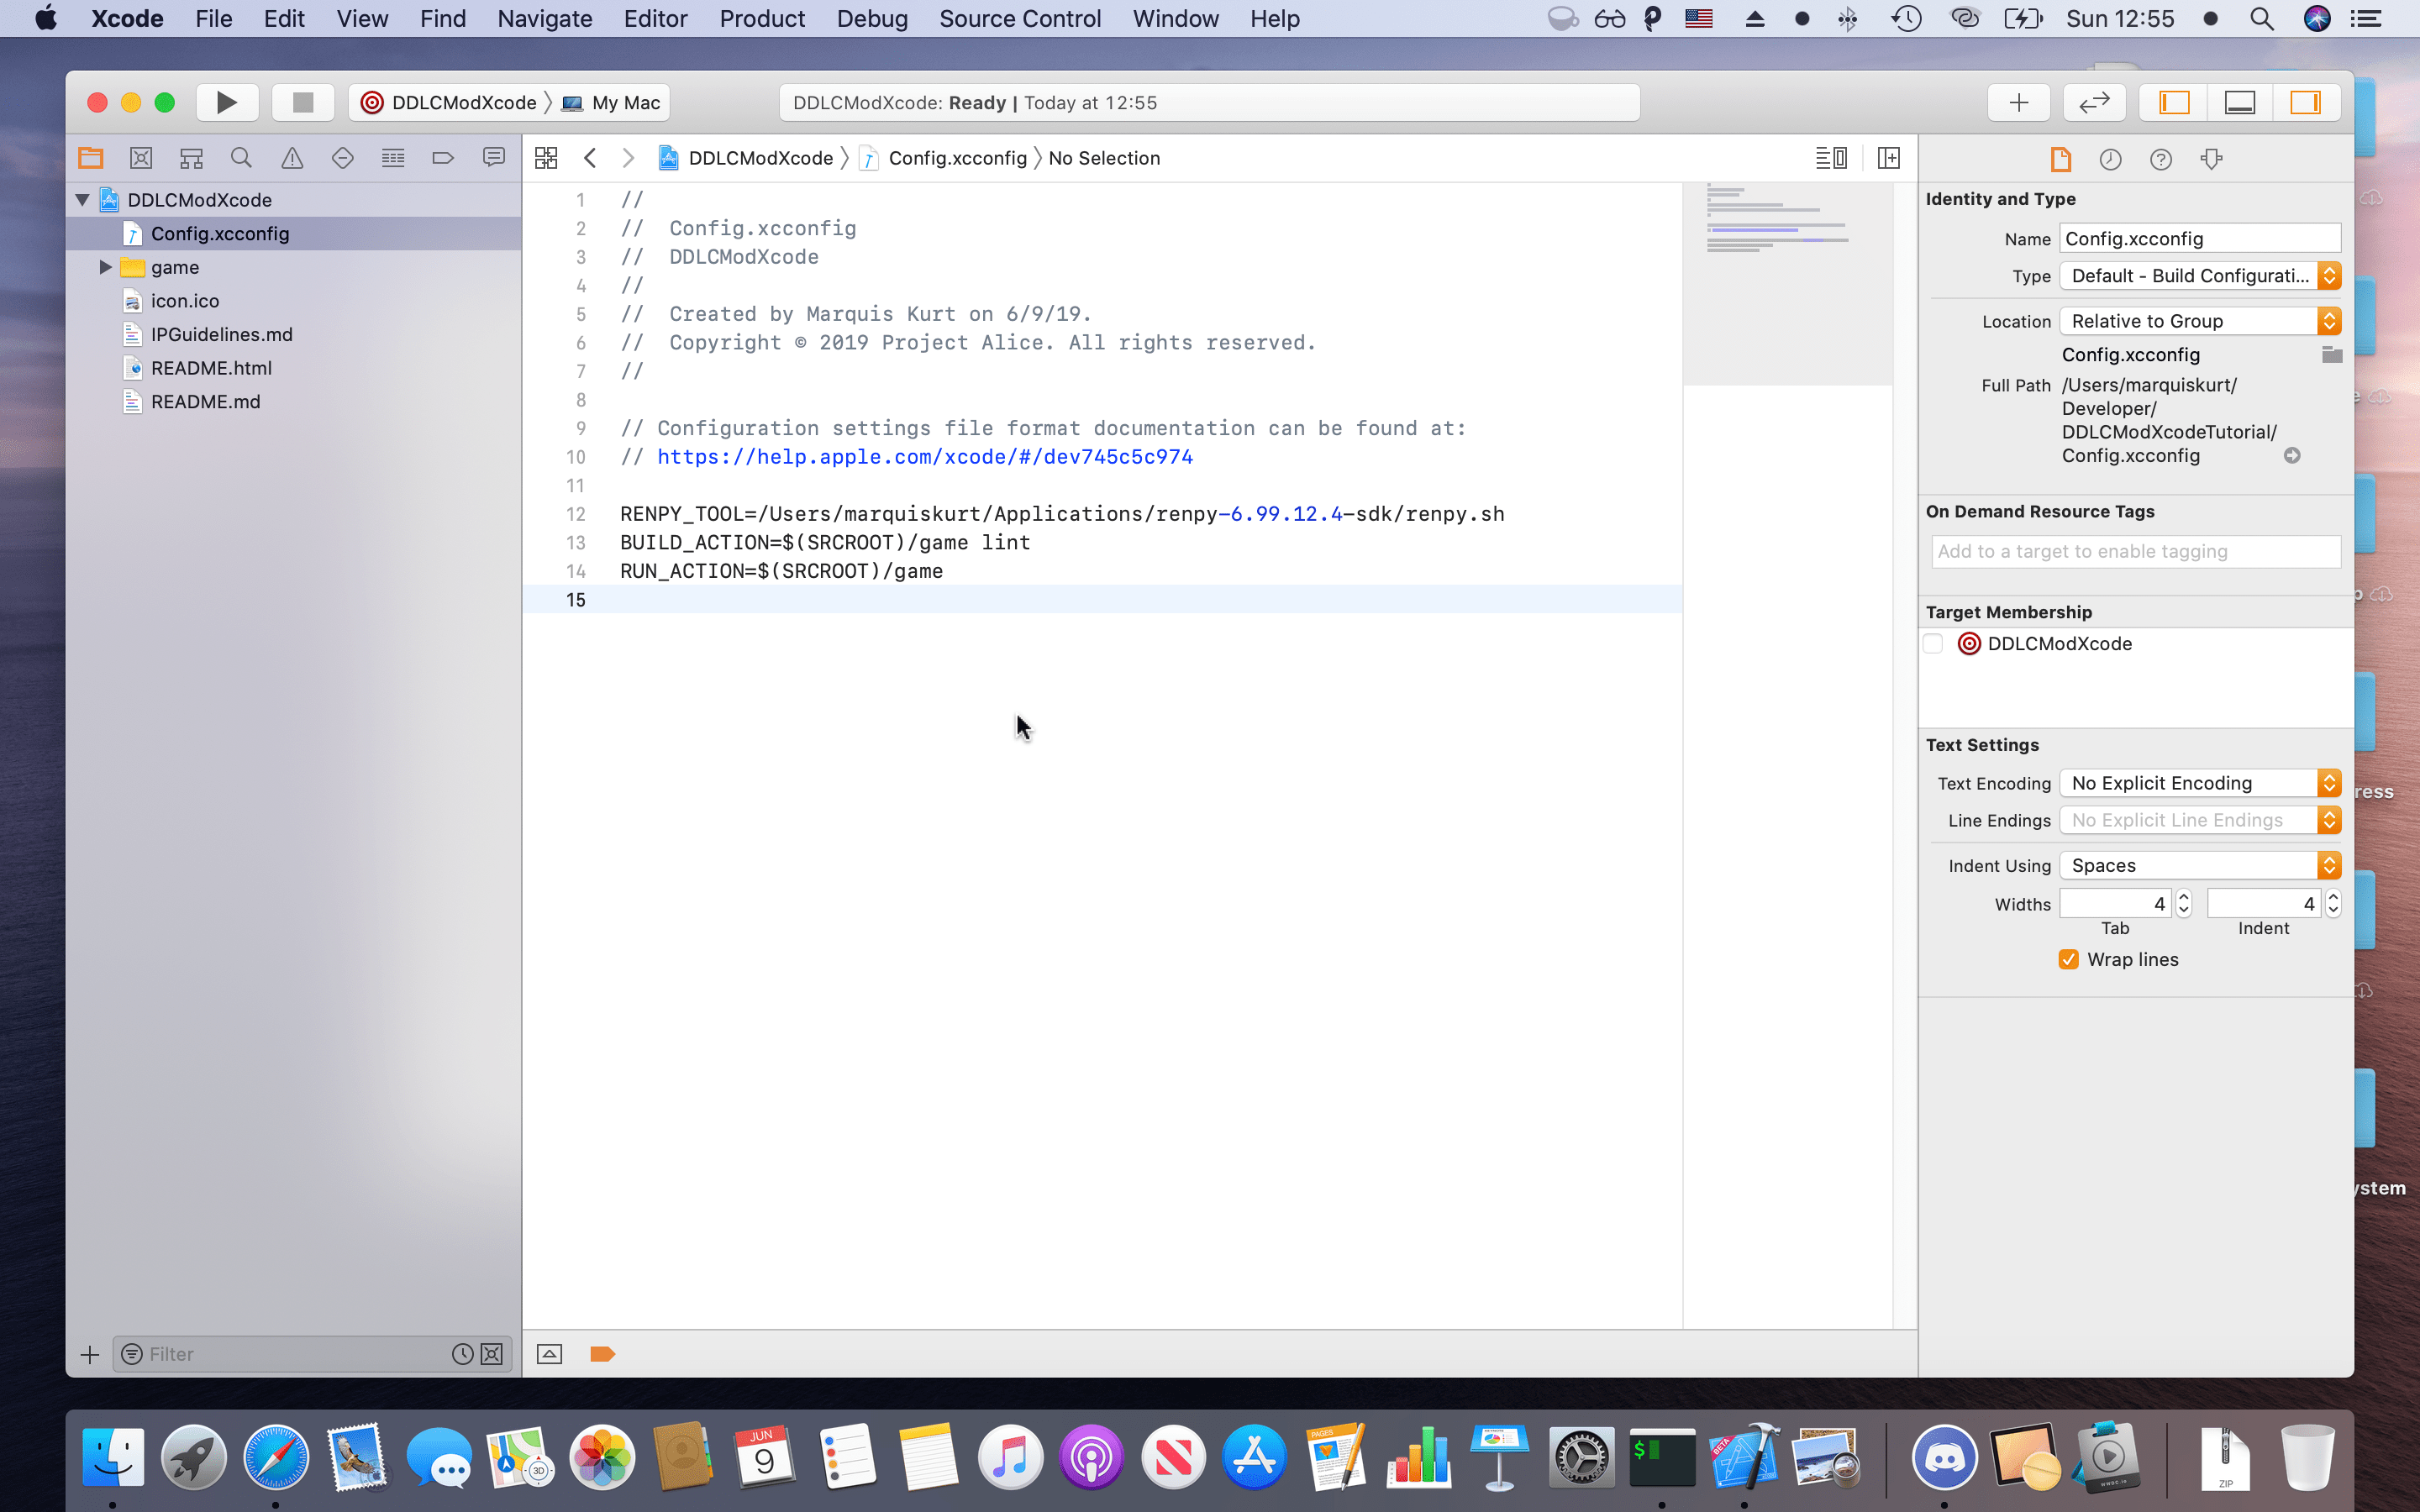
In that config file, create two new variables, RENPY_TOOL and BUILD_ACTION and set it to the following commands:
RENPY_TOOL=<Where your Ren'Py is located>/renpy.sh
BUILD_ACTION=$(SRCROOT)/game lint
RUN_ACTION=$(SRCROOT)/game

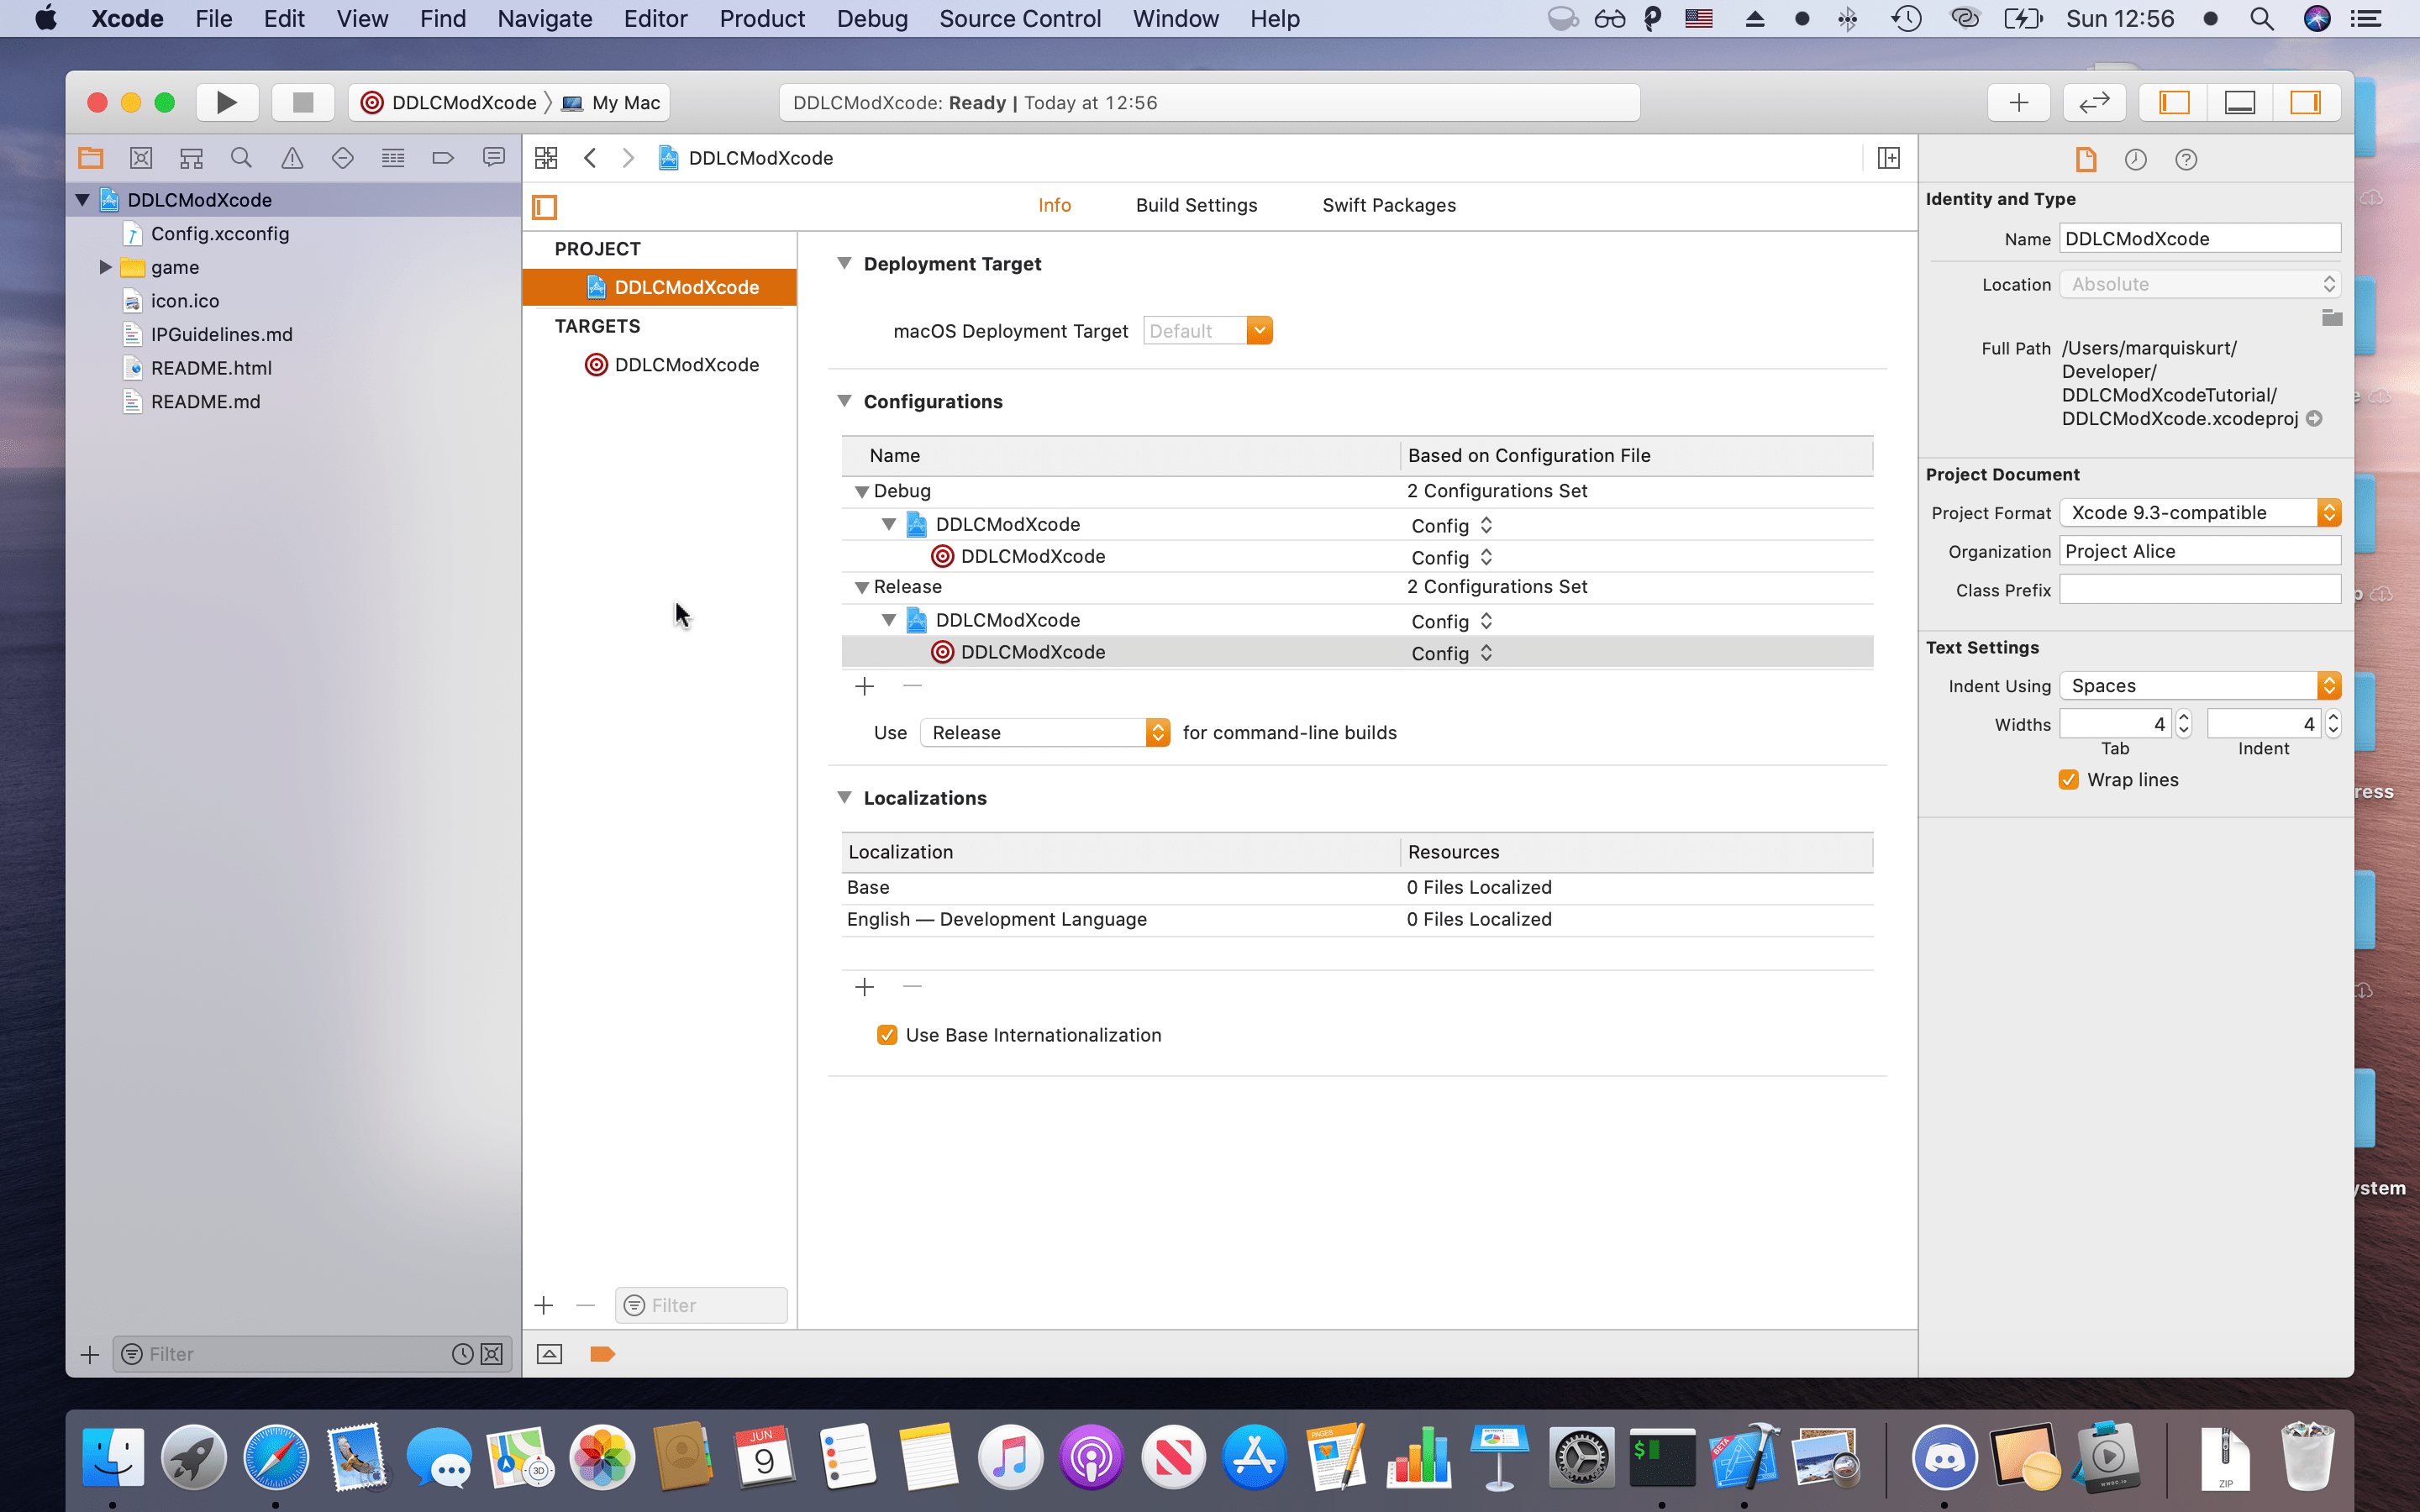
Back in your Xcode project settings (Info), make sure you set your Configurations for Debug and Release to “Config” or whatever the config file was named. This will make the process a bit easier to test.
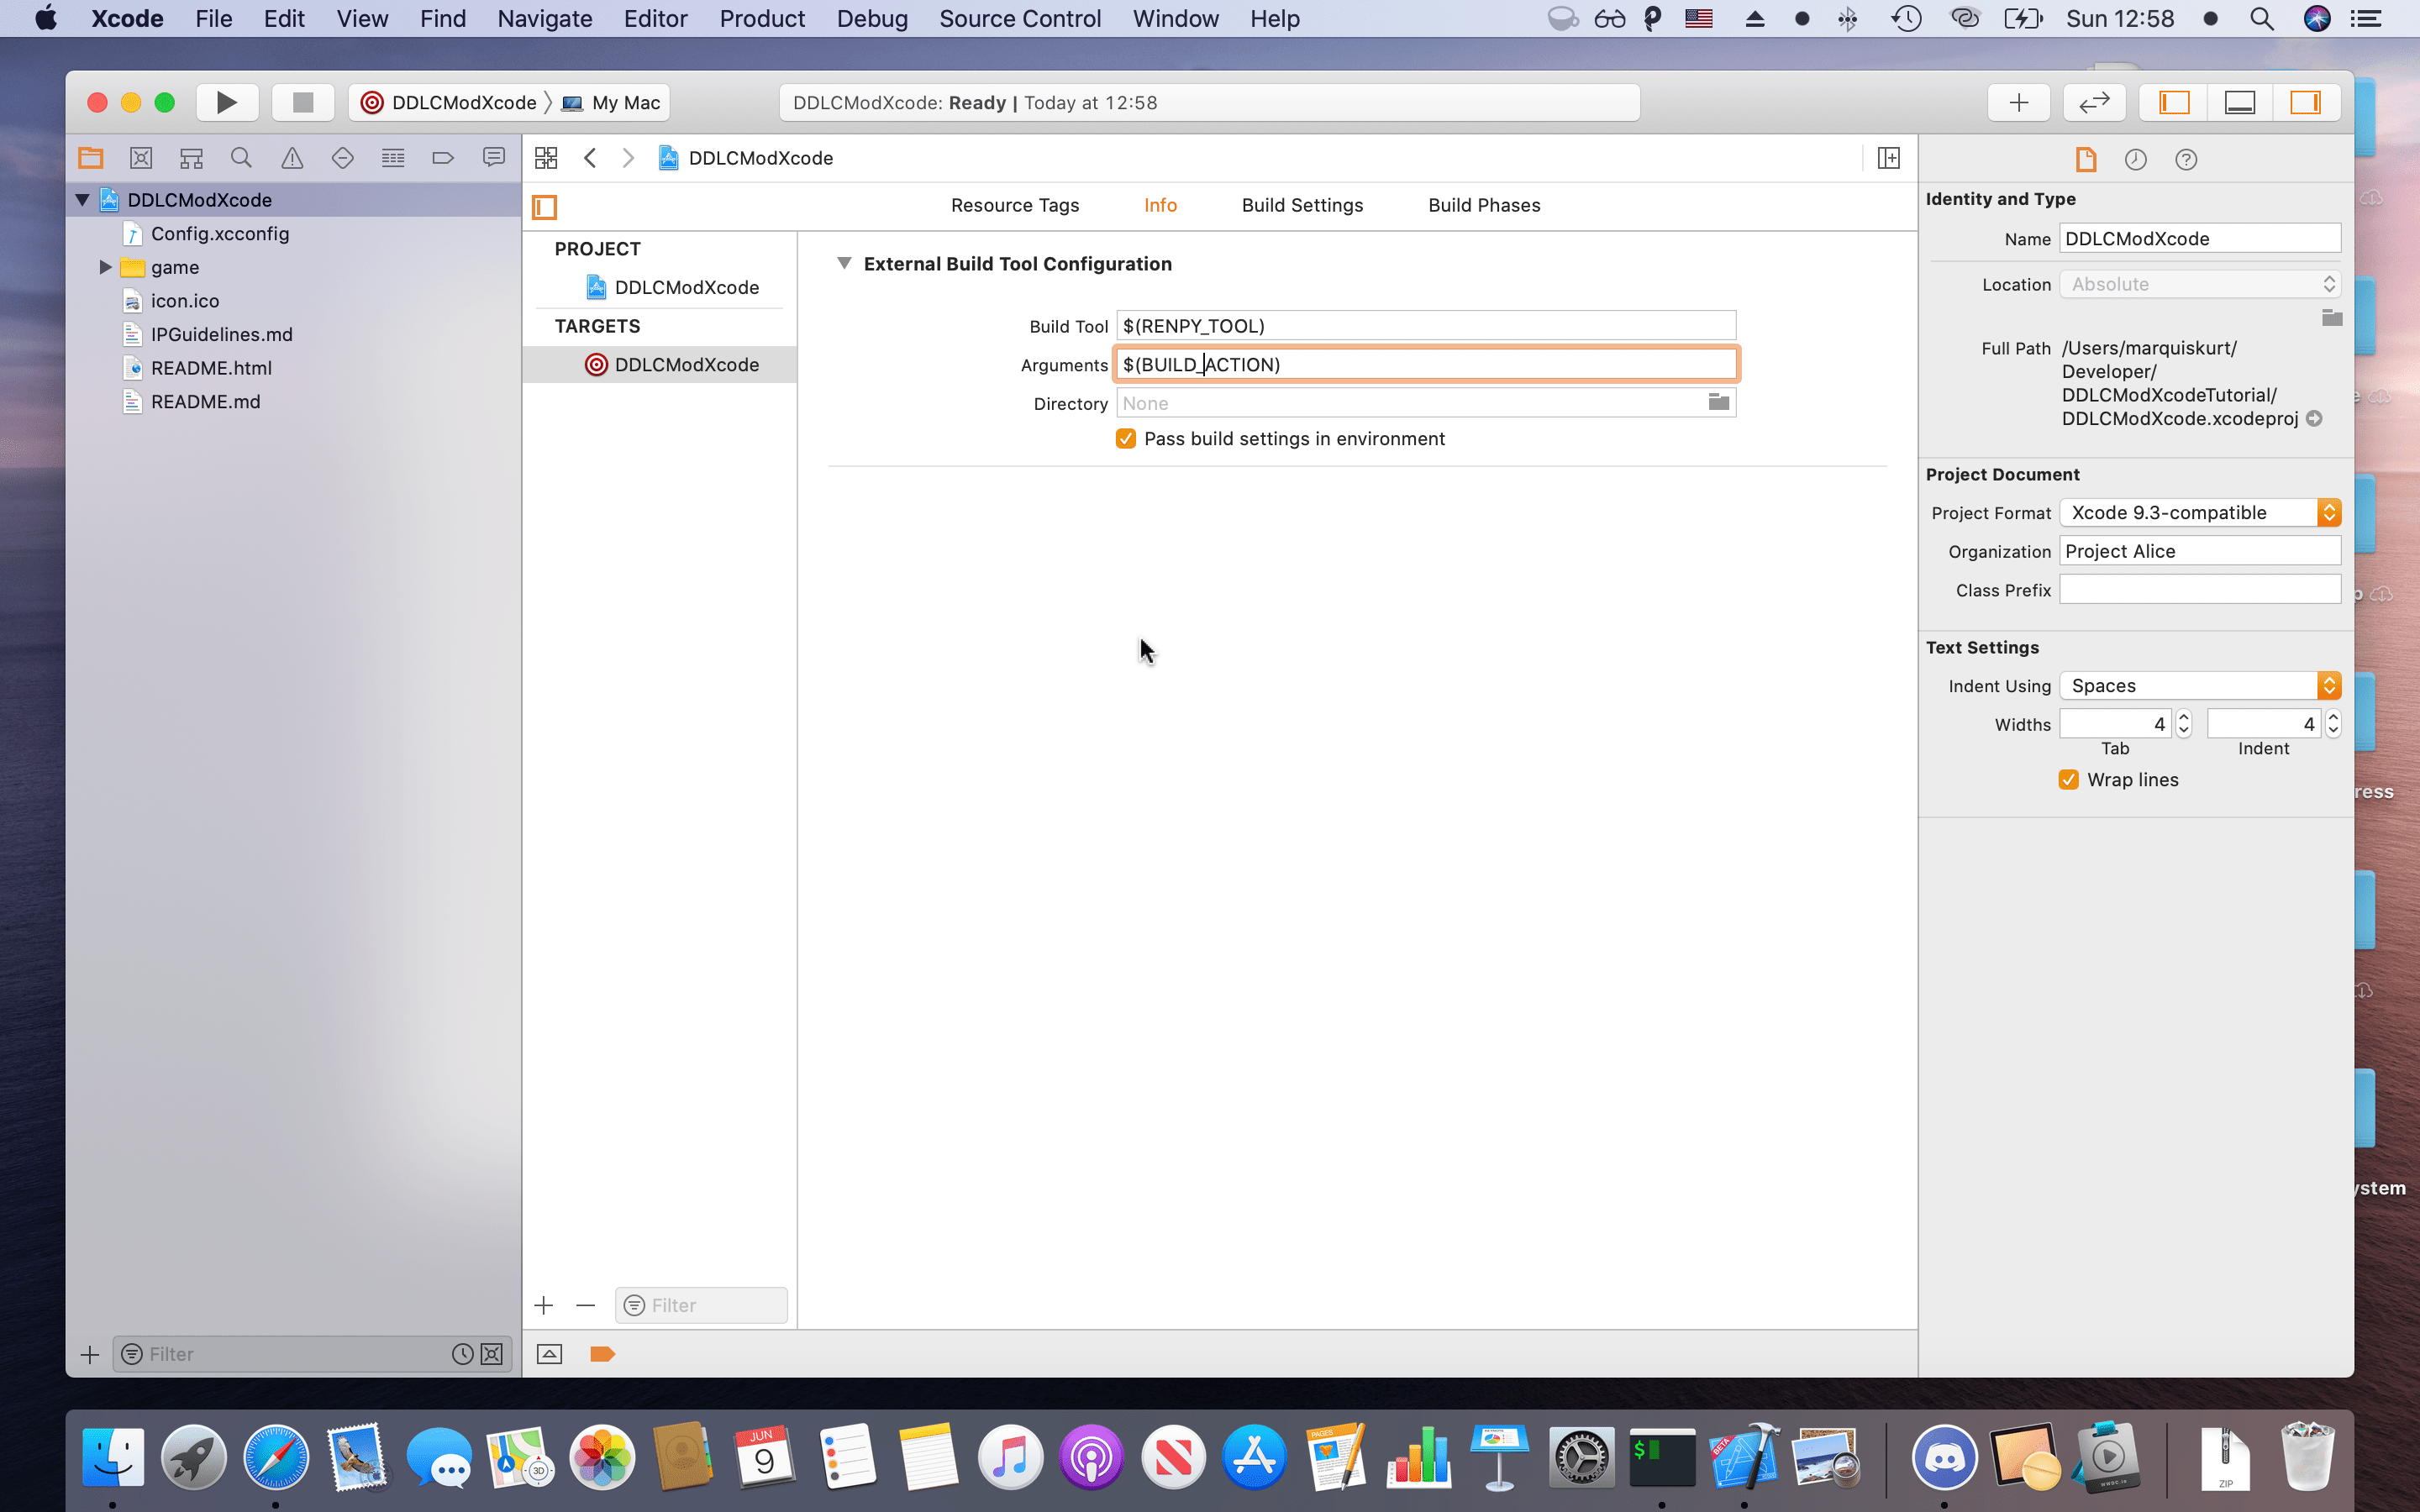
In your target’s build settings (Info), change the Build Tool field to $(RENPY_TOOL) and Action field to $(BUILD_ACTION).
When Xcode runs the build command, it will read the variables we set from earlier and run the Ren'Py lint command on our work. You can test it by pressing the Play button in the toolbar or using the Command+R kwyboard shortcut. If done correctly, you should see Xcode run the command and eventually say “Build Succeeded” like it would for any Apple project. If this doesn’t work, make sure you pointed Xcode’s settings to the correct variables and Ren'Py location, respectively.
Run support
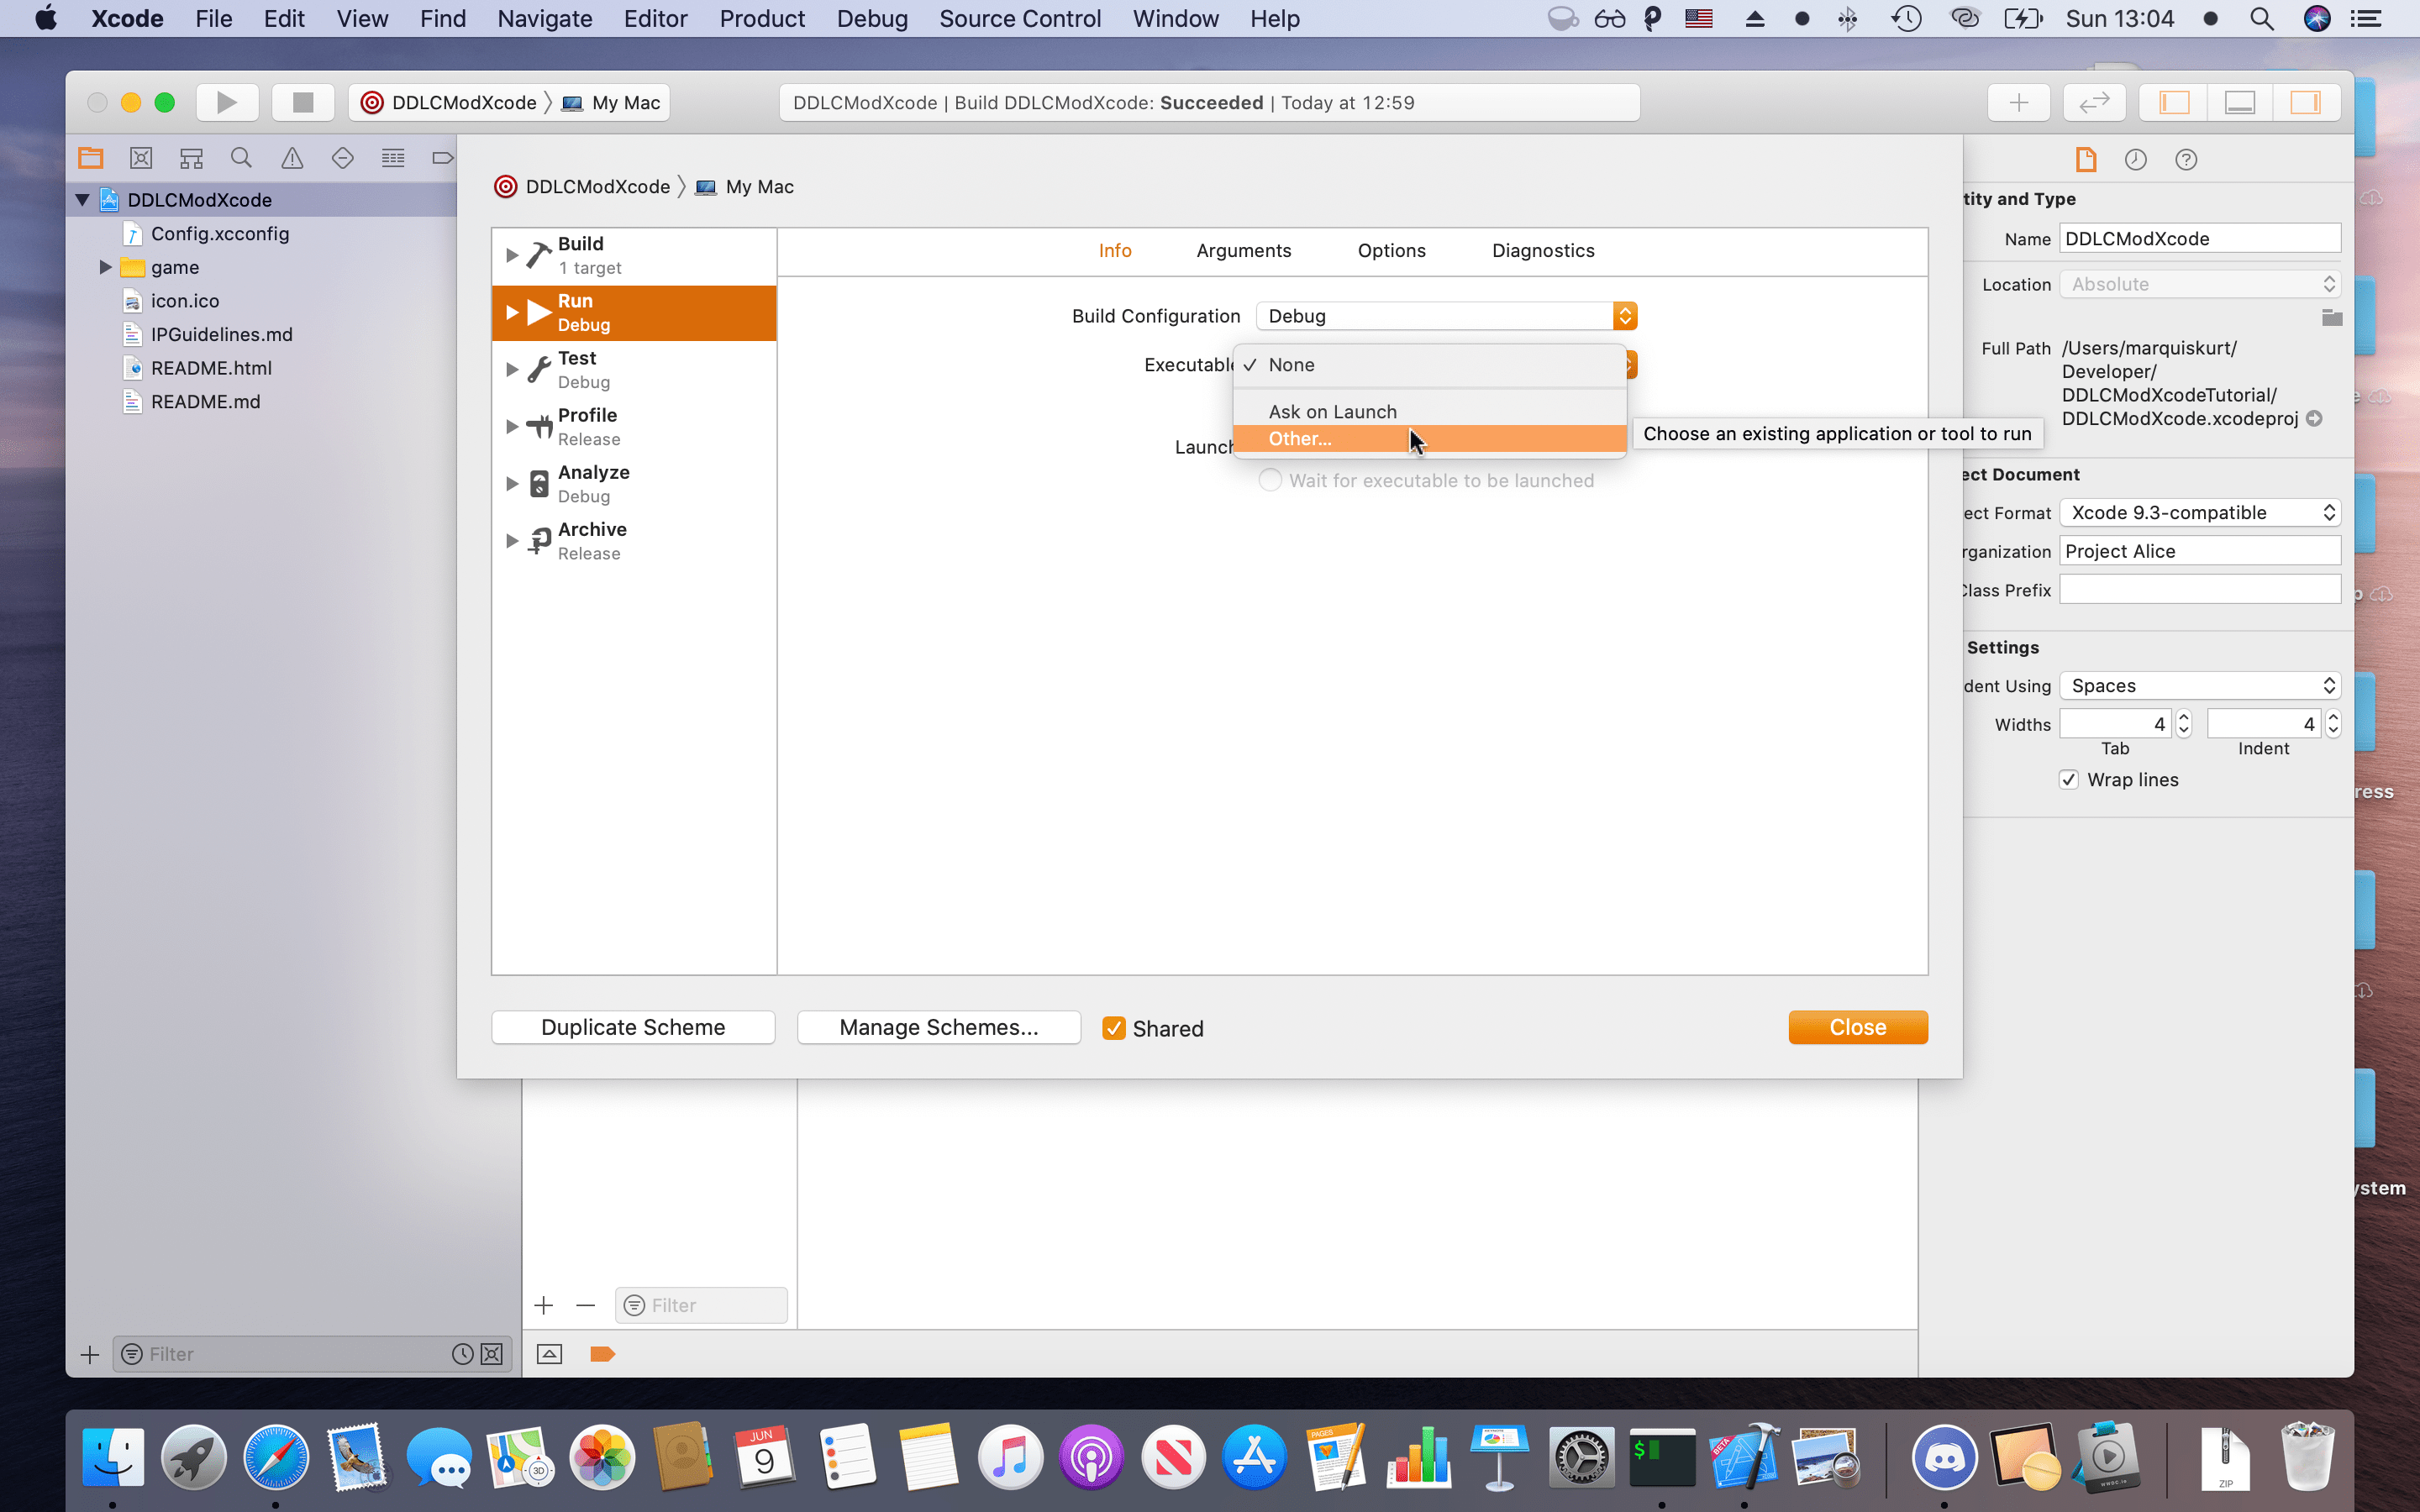
Finally, it’s time to add the run support. Currently, Xcode will build the project, but do nothing more, which can be kind of frustrating. Head to your schemes manager and click “Edit Scheme”.
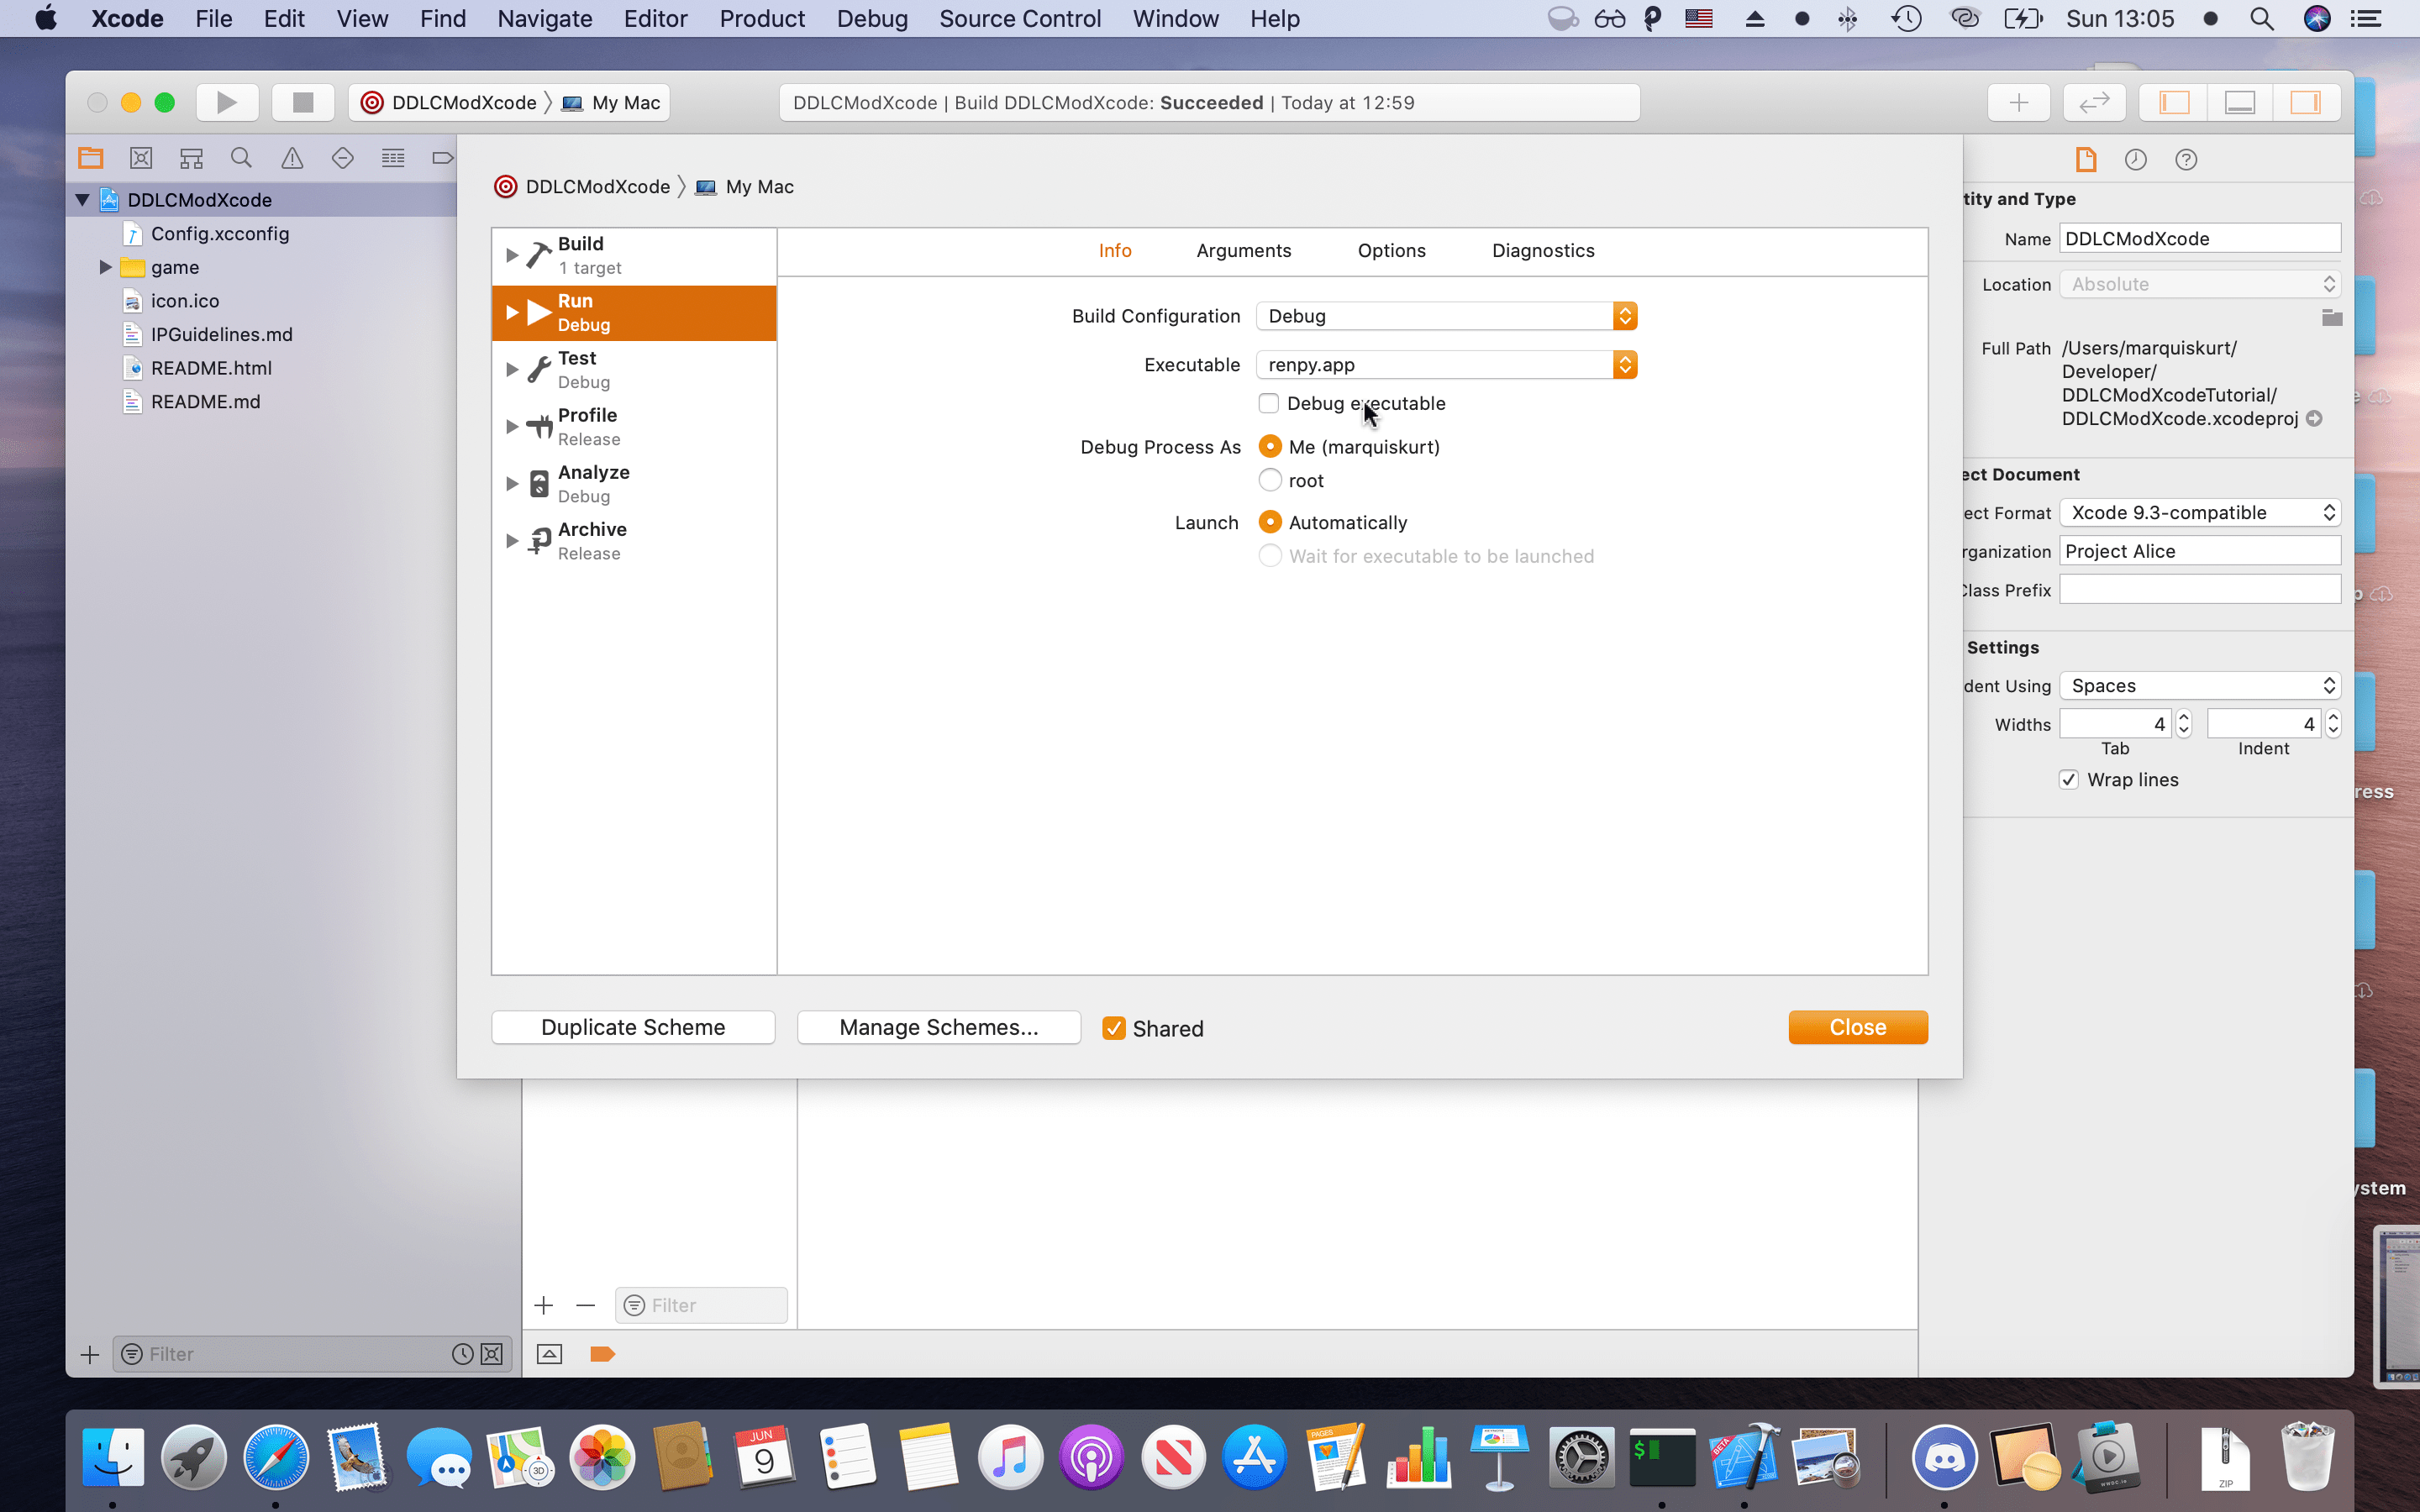
Under the Run > Info section, select the Executable field to where renpy.app is stored (click “Other” to open the file picker). Xcode will automatically figure out to run the correct binary inside, so you don’t need to worry about it accidentally running the launcher.
Uncheck ‘Debug executable’ since we don’t need to debug Ren'Py.
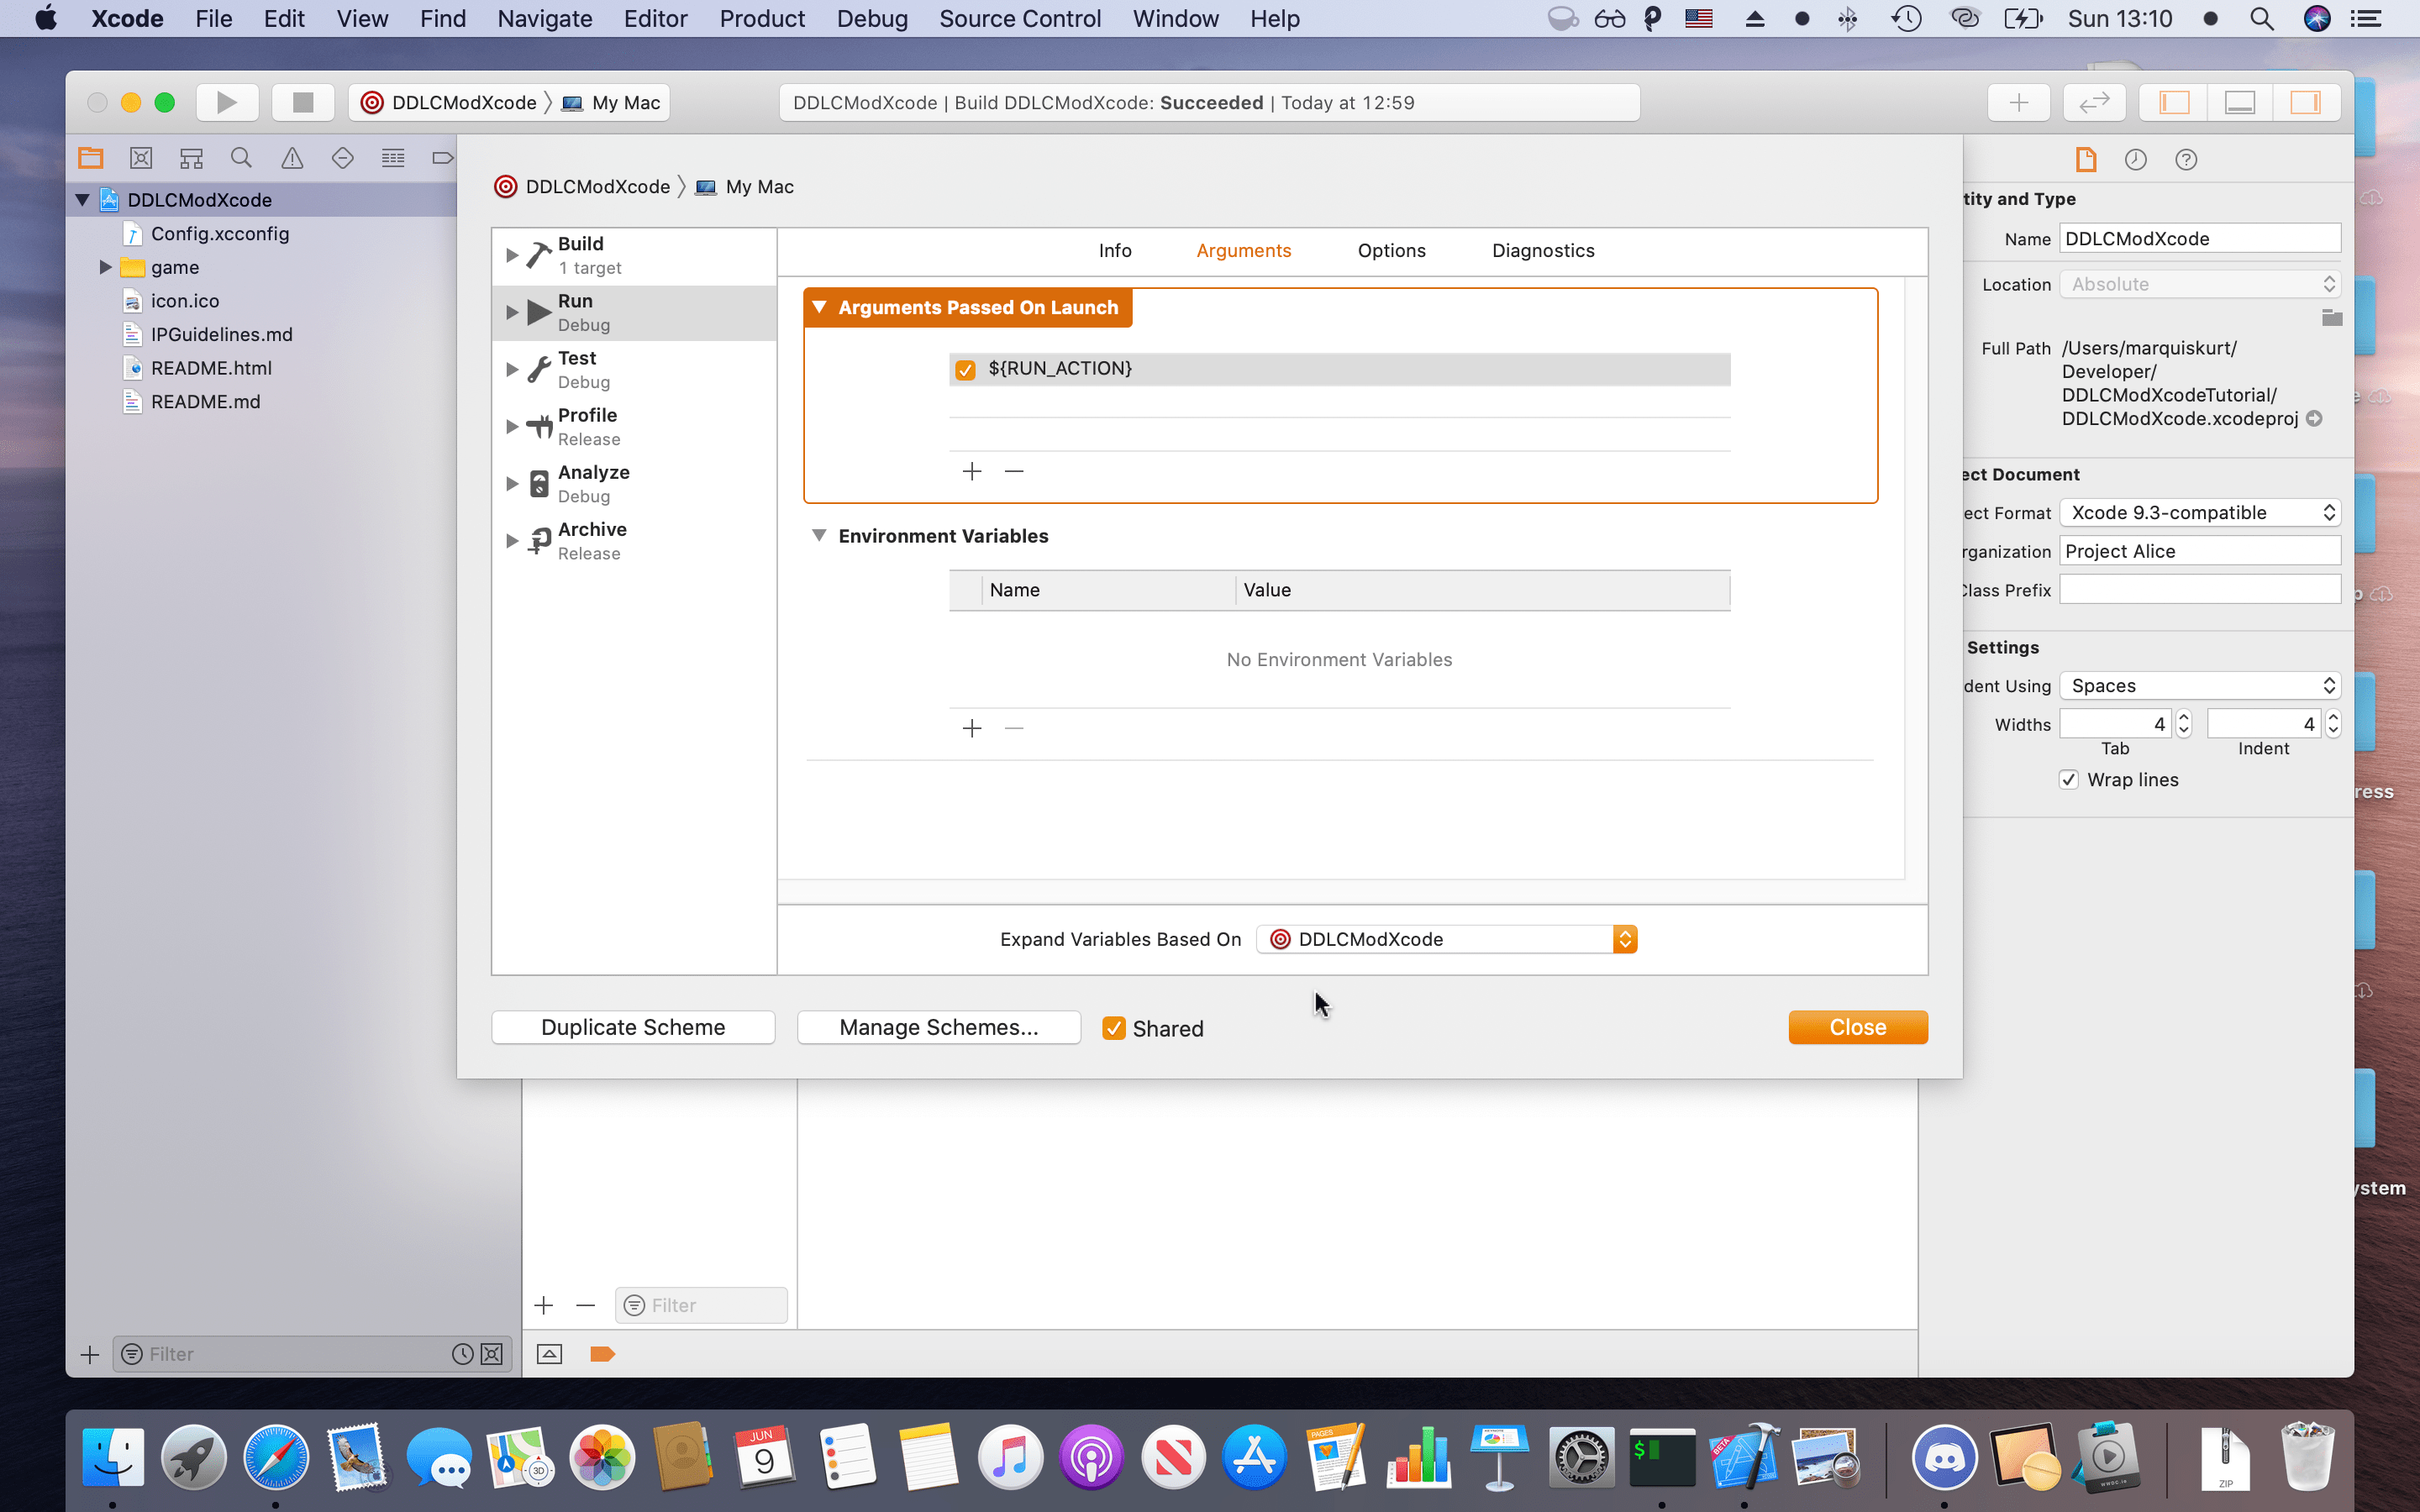
In the Arguments section of that same page, add ${RUN_ACTION} as an argument passed on launch and set the bottom “Expand Variables Based On” to your Ren'Py project target.
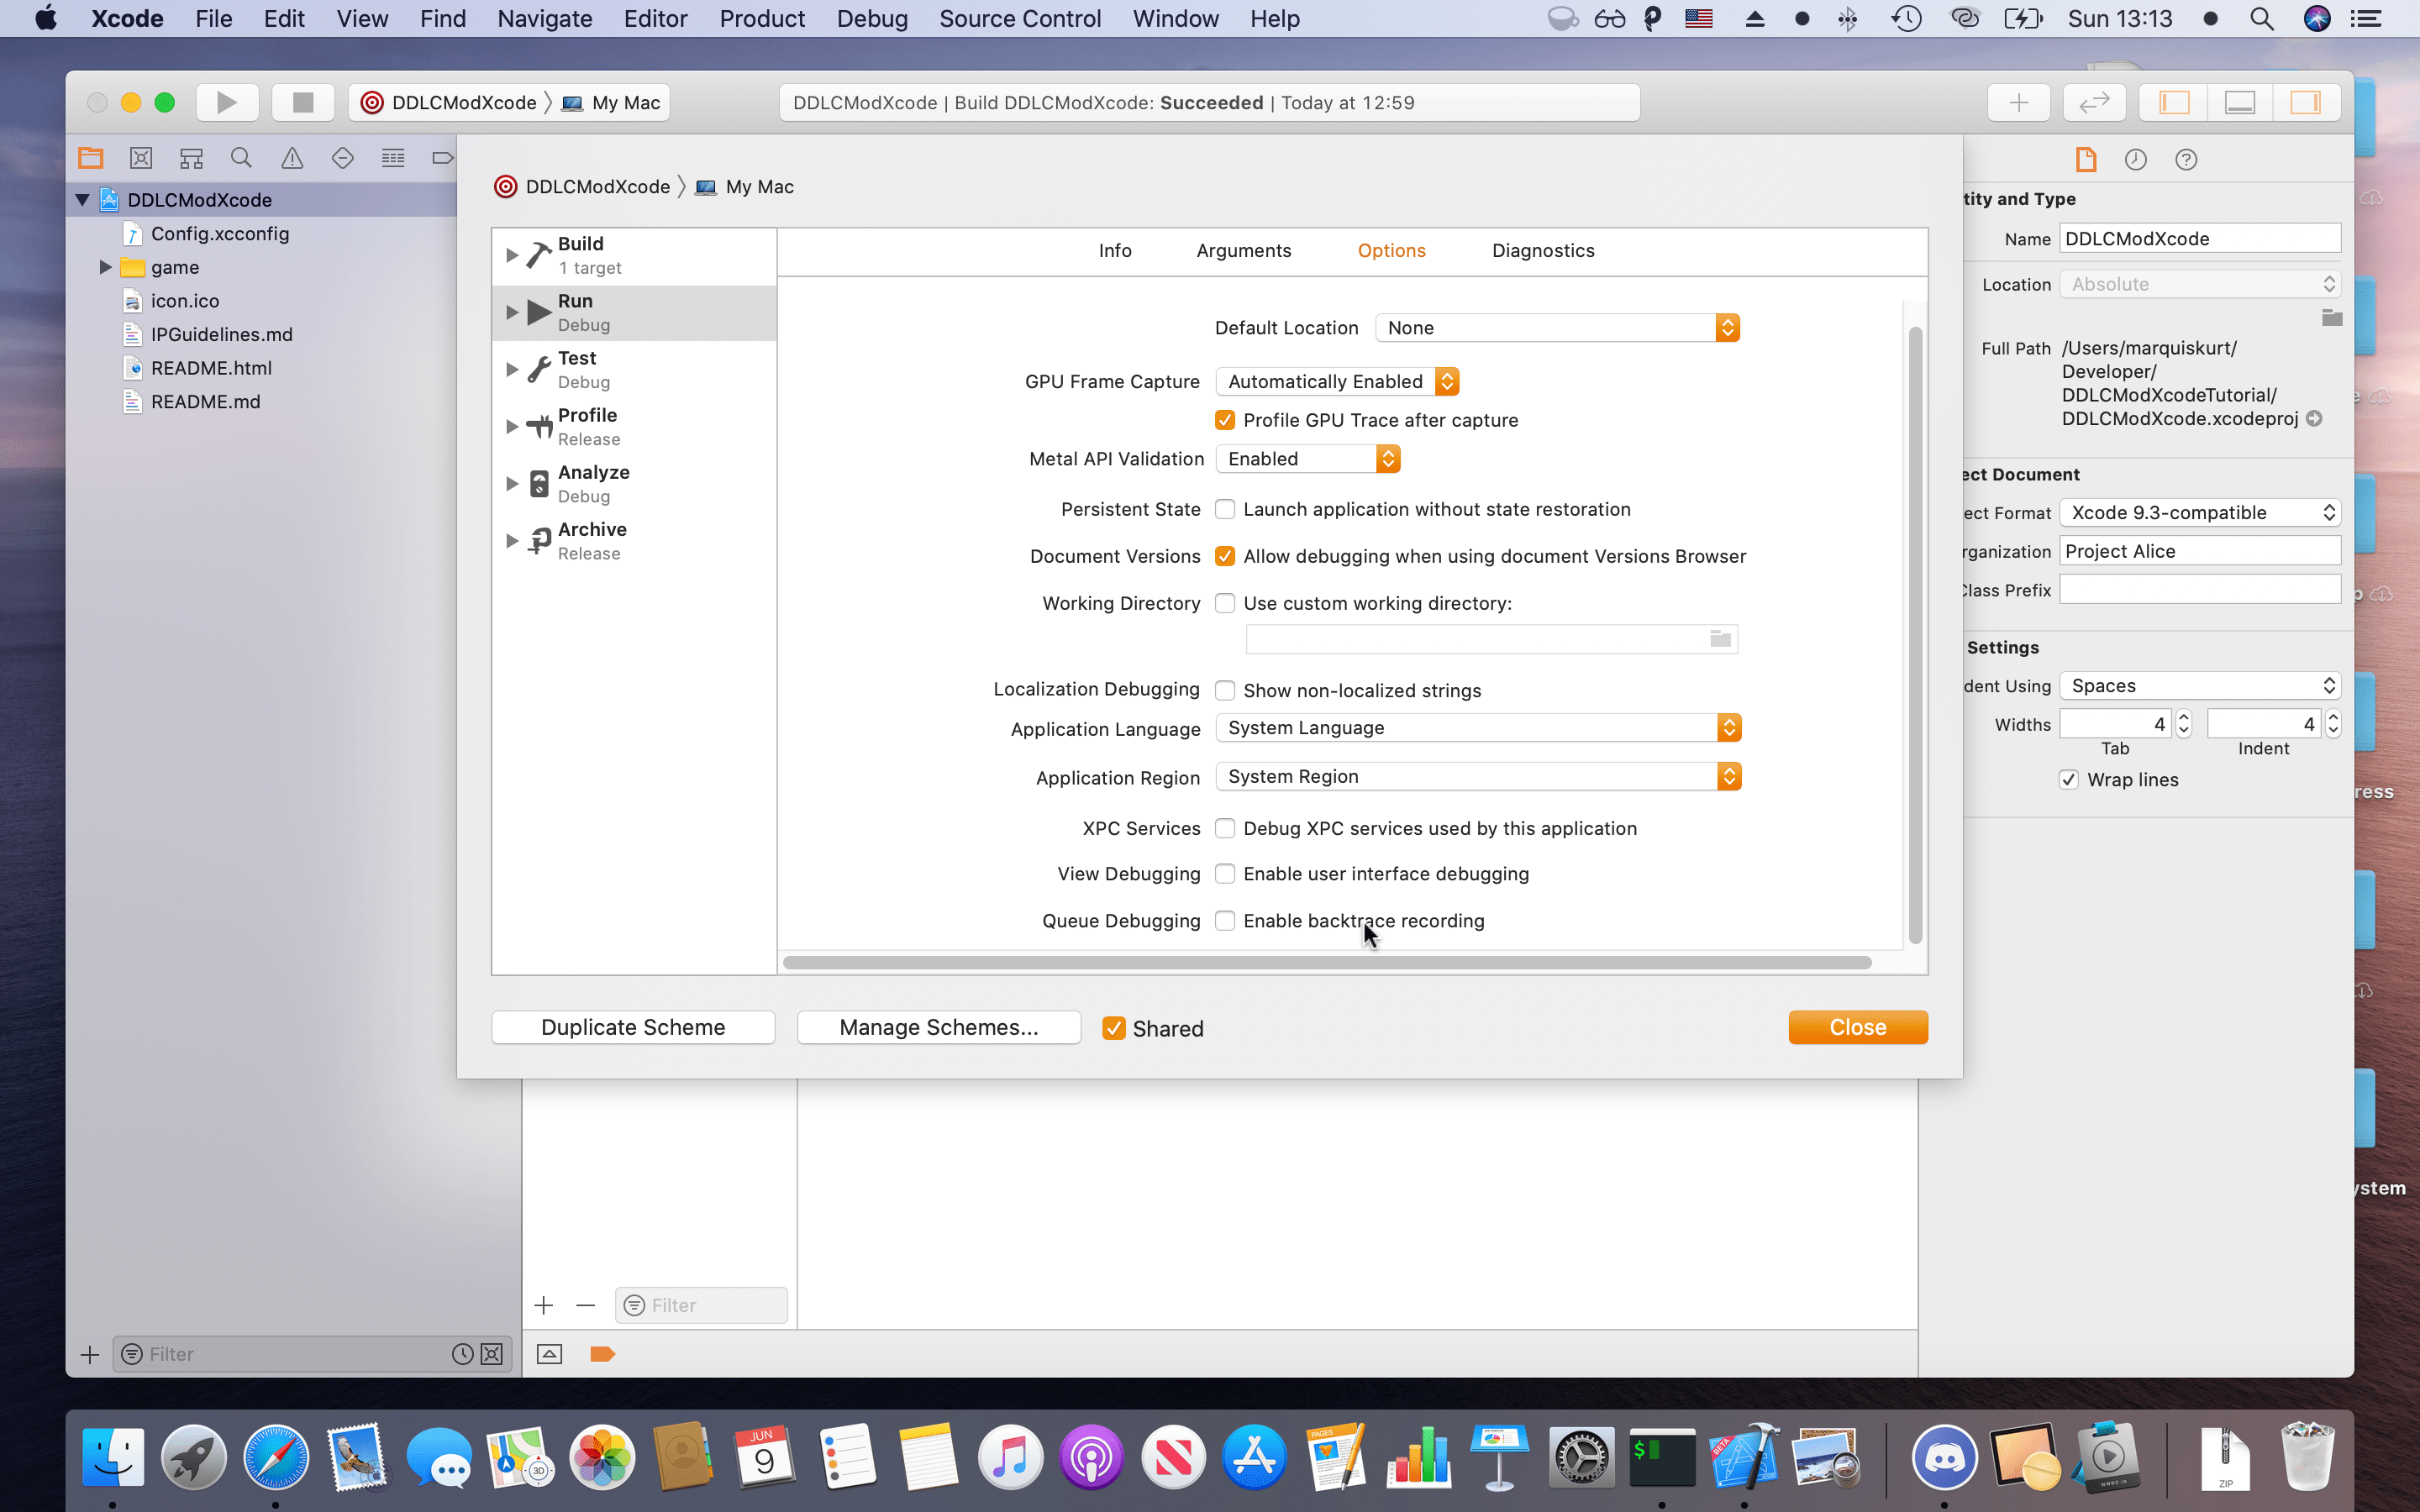
We’re almost done, but we need to turn off some Xcode options so that Ren'Py doesn’t get confused when Xcode passes an invalid parameter. In Options, turn off the Allow debugging when using documents Version Browser, Enable user interface debugging, and Debug XPC services used by this application.
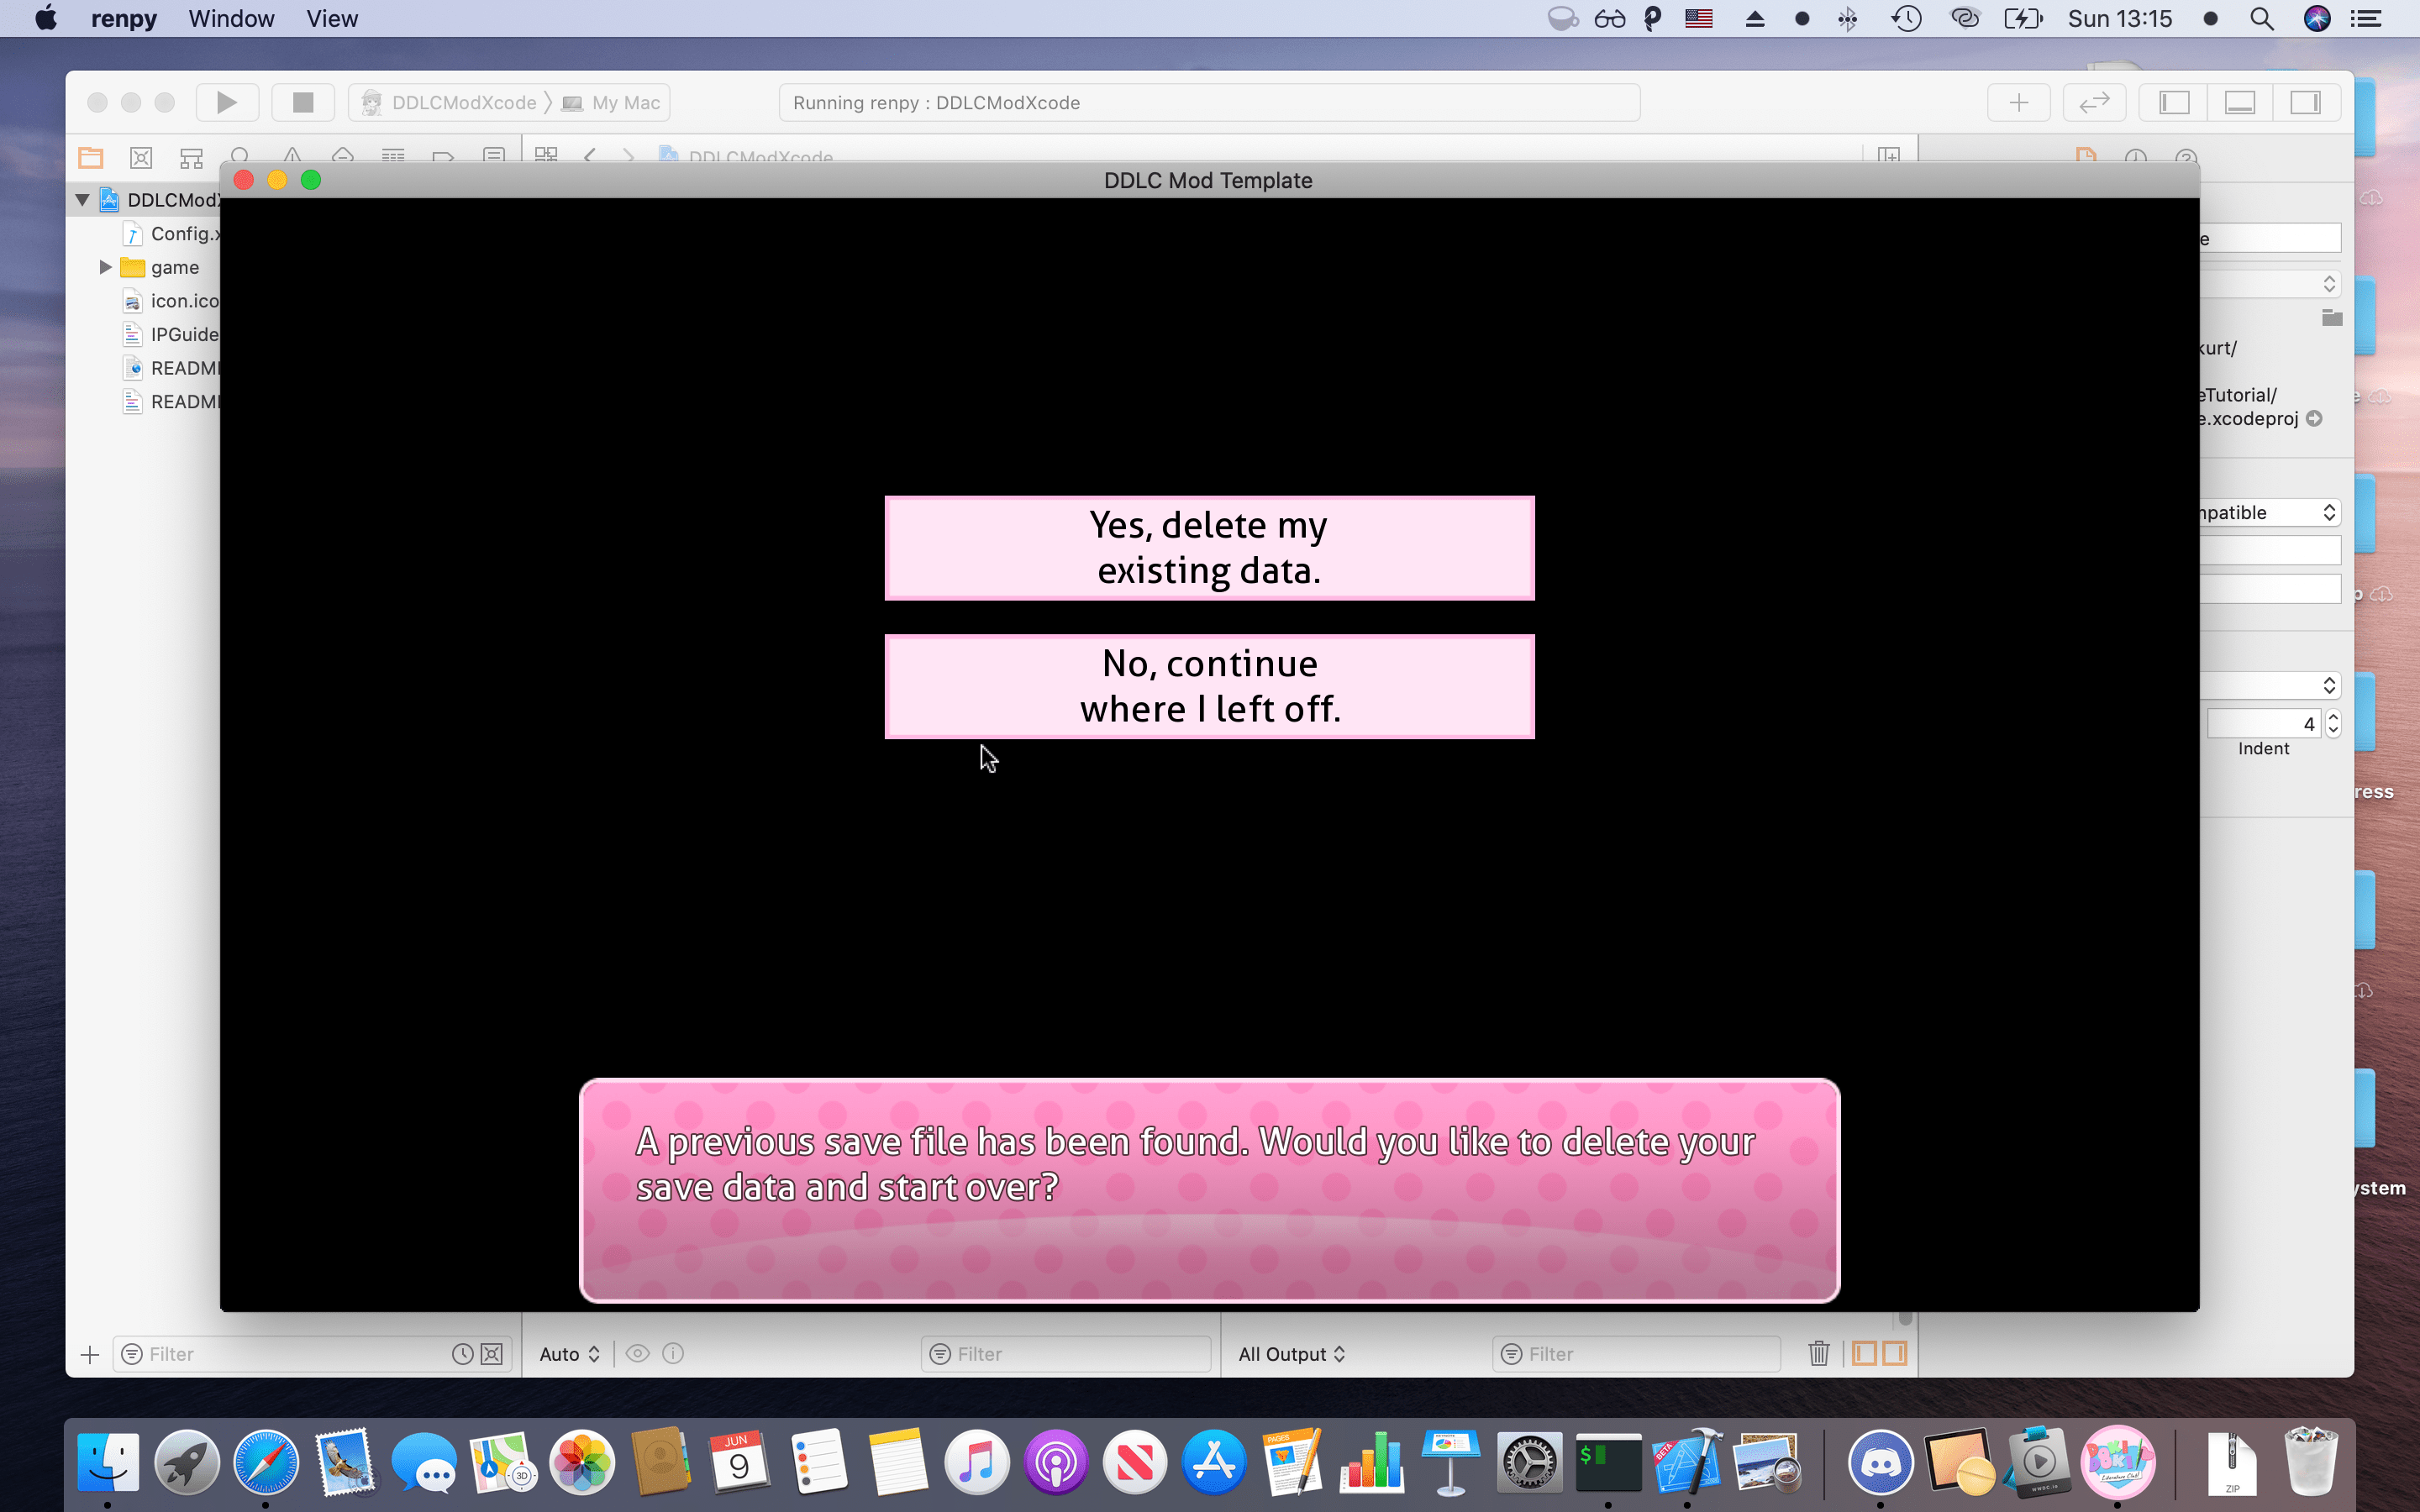
To make sure everything works, hit the Play button or press Command+R on your keyboard again. If everything works correctly, you should see Xcode build your files and then open Ren'Py!
What can you do with Xcode now?
Now that you’ve set up your Ren'Py project with Xcode, you can start to take advantage of some features that Xcode provides. I use the following features below in my workflow that make development a little easier (again, some features are Xcode 11-specific):
- Using Xcode’s Source Control GUI to manage your repository (if you have one)
- Using the
MARKin comments to make sections. In Xcode 11, theseMARKcomments help section off the minimap view so you can quickly jump to a given location in your code - Python syntax highlighting
- Split-view editors (improved a lot in Xcode 11)
It’s important to note that you’ll still need to use Ren'Py Launcher for the time being to create release archives, though I might find a way to do this through Xcode and write a follow-up to this article.
I’ve manged to set this Xcode project up with Project Stein as well, and it’s visible in the a development branch. Hopefully, this tutorial will help you integrate Xcode into your Ren'Py workflow and tidy things up a bit! Keep coding, Ren'Py/Xcode devs; you rock!