I built an app to navigate my Minecraft forever world.
Minecraft has been a staple childhood game for me, and it’s something I play every now and then. I came across a video for starting a “forever world”, and I set up a quick Minecraft server for myself. Since then, I’ve played more frequently… and I made a companion app to go with it.

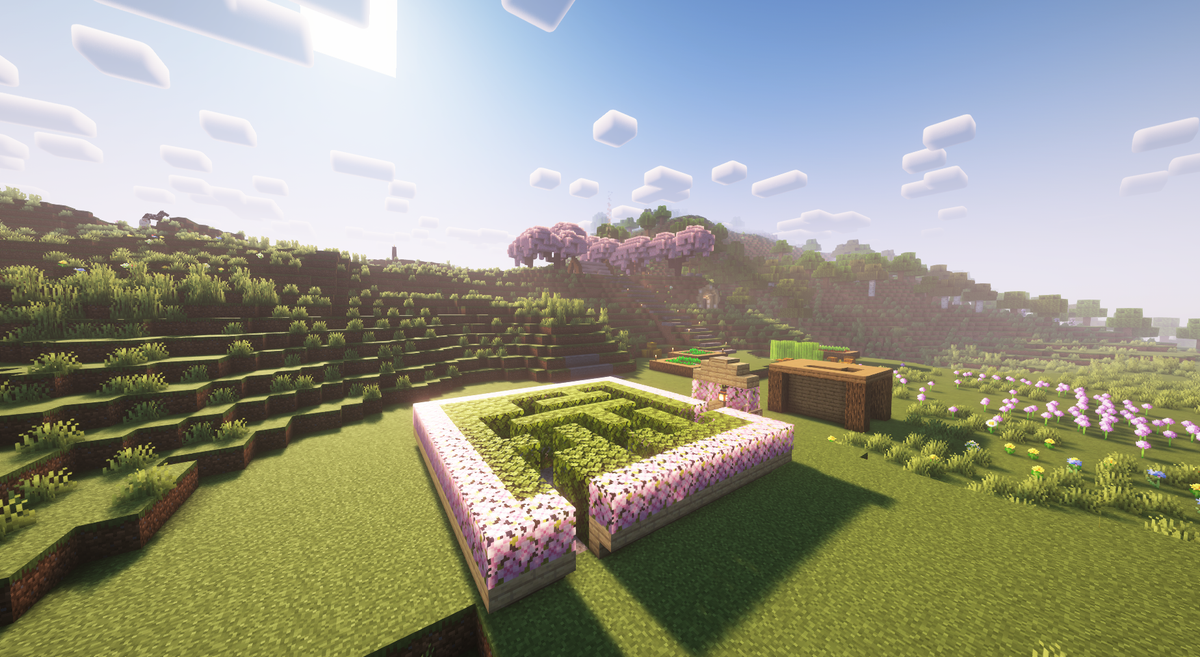
Minecraft has been a staple childhood game for me alongside the Portal series, and it’s something I play every now and then. I’ve played various versions over the years the years, from the Xbox 360 Edition to the Java and Bedrock versions. Earlier this year, I came across a video for starting a “forever world”, a Minecraft world that’s designed to last for years with everything that you’ve done being in a single world instead of having multiple worlds. I figured this would give me an ignition to play it for longer and create wonderful things, so I set up a quick Minecraft server for myself with Geyser installed, allowing me to play anywhere, on any device. Since then, I’ve done all sorts of things in the world… and I made a companion app to go with it.
A while ago, I went to look for a Pale Garden to get materials, and I wasn’t having the greatest experience with Chunkbase on the iPad. Other apps on the App Store didn’t fit my needs, either, and it wasn’t an ideal experience. Normally, I’d leave things as they are and continue playing Minecraft with a different plan in mind. However, I eventually came across the Cubiomes project, which provides a neat little C Library for mimicking Minecraft Java world generation and, on top of that, creating map images. As an experiment, I quickly threw something up with a Swift package to try generating an image. This package, now known as CubiomesKit, became the fundamental basis for a project I’d take on for a few months and eventually publish: Alidade.
The journey begins
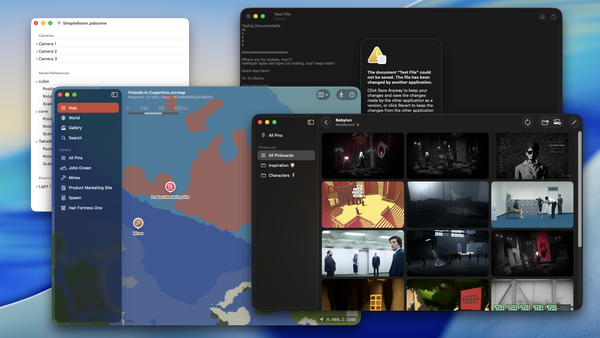
The premise was simple enough: create an experience like Apple Maps for Minecraft Java worlds, using native technologies, and prefer a file-over-app approach. I quickly got to work on a simple document-based app using SwiftUI, providing a means of setting the world seed and corresponding Minecraft version, and showing the world at (X=0, Z=0). From there, I quickly expanded the app to support jumping to locations with the search bar, and being able to pin locations so that I can revisit them at any time I’d like. Later, I added the support for creating the pins in-app, freeing you from needing to edit the file manually.
Once I got these parts in place, I swiveled to focus on the presentation of the app; notably, I wanted to recreate the sheet behavior of Apple Maps on iOS and iPadOS. Since the system provided controls didn’t replicate the behavior I wanted, I settled for a custom solution that adapted to the app window’s width. The dragging control can sometimes be finicky, and I later had to use this implementation for the sheet when iOS 18.4 released, but it gets the job done, and I’m pleased with the results. During this time, I threw together mockups in Sketch to let me get a better feel for how I wanted the UI experience to be like, rather than throwing everything together with code and seeing what stuck.
After figuring out the app’s visual architecture and structure, I proceeded to add support for switching between Minecraft’s dimensions (Overworld, Nether, End) like as if you were switching between different map types. Alongside this, I started beefing up search by adding the ability to search for nearby structures and displaying the results relative to your current location.
The pins are the key
At this time, I received feedback from a few peers as I had been posting these updates in a Discord thread. One of my peers, Toad, suggested the ability to display screenshots or images provided by players to help better identify pins. I loved the idea, as it meant that maps could be much more personalized, and I got to work on making the structural changes needed to making that happen.
First, I changed the file format from a simple JSON structure into a package format, which contains several directories and the main Info file, authored as a JSON file. This would allow me to keep local copies of images inside the file, thereby making portability possible. Additionally, this allows for expansion in the future, if I decide to add more to the file format.
After updating the file format, I got to work on adding extra details to pins. First, I added a new “about” section that lets players write any additional information for a pin, such as what builds are nearby, sentimental value, or even plain raw notes. Following this, I added the ability to add photos to a pin by referencing its file name in the package, and automatically deleting said files whenever you remove a pin. For Alidade, the app will convert the images over into high-efficiency image formats (heic) to save space, and you can upload from your Photos library or from your computer, if you’re running the app on a Mac. Finally, I added a conversion feature that shows the pin’s coordinates for both the Overworld and the Nether, so that you can plan out Nether roads and other travel strategies much more easily.
Prepping for a public beta
After updating the pins, I proceeded to focus on polishing the experience. For the Mac, I focused a lot on the new document experience so that it was easy to follow and supporting keyboard shortcuts. For iOS and iPadOS, I looked into improving the general accessibility of the app, ensuring that the VoiceOver readouts made sense. Between both of them, I eventually added the ability to search for nearby biomes, improving the experience with concurrency and better state management to make sure the app didn’t freeze.
Once all the pieces were in place, I proceeded to send a build up to App Store Connect so that I could get it tested with TestFlight. Thankfully, the process was less painful because I set up distribution via Xcode Cloud, and I took care of the other important bits. While I waited for Apple to review both builds for macOS and iOS/iPadOS, I focused my attention on marketing materials and the website, as I wanted to ensure that I had a smooth release path (as I discovered later, this would be the least of my problems).
After a short while, Apple gave me the rubber stamp of approval for TestFlight, and I quickly got to work sharing it with my fellow Playdate friends and iOS developer peers to get feedback. I kept making adjustments with the interface, providing more helpful tips, and ironing out minor bugs until it got to a point where I was fairly confident in releasing it to the App Store... until I got mildly annoyed by the navigation system.
The wildest use of MapKit?
For the duration of Alidade’s development until this point, the core navigation experience wasn’t what I imagined it to be. Rather than being able to pan around and zoom like you would with services like Apple Maps and Google Maps, you had to work with a tiny navigation wheel to move around, loading in a small snapshot at a time. While I was fine with it for the minimum viable product, I knew that folks would be dismayed by the experience, and that I needed to do something better if Alidade was to be successful by any metric.
With this revelation, I researched the various options I had at my disposal. There wasn’t much in the realm of SwiftUI that I could work with aside from a small infinity grid package I found. Sadly, that package didn’t fit my needs, because I would have needed to implement my own chunking system, and it would’ve been pretty difficult to handle myself. How would I know what’s off the screen in SwiftUI? Where is the center of the view relative to the world? How small should the tiles be?
Frustrated and defeated, I started looking elsewhere, hoping that someone has solved this problem. To my surprise, I came across a cheeky solution: MapKit. MapKit is typically used to display maps of the real world along with annotations and content that is overlaid on the map. One of these overlays is a tile overlay, which lets you draw your own map tile over (or even replacing) the existing one Apple provides. Initially, I dismissed using MapKit because the tile overlay code I looked at assumed I was loading from a remote server, such as:
http://map.augenwaldburg.org/tiles/{x}/{y}/{z}?scale={scale}
However, I later discovered that you could alternatively override the function used to generate the appropriate data to send to MapKit to render the tile:
class MyTileOverlay: MKTileOverlay {
    init() { ... }

    func loadTile(
        at path: MKTileOverlayPath,
        result: @escaping (Data?, (any Error)?) -> Void
    ) {
        do {
            let myDataTile = try mcWorld.load(path: path)
            result(myDataTile, nil)
        } catch {
            result(nil, error)
        }
    }
}
This alone opened several doors. If I could find out how to map or project a Minecraft world onto the real world, I could instantly have an Apple Maps-like experience with all the features I want for free. Consequently, I got to work with implementing my own MapKit view that used Cubiomes to render the map tiles. It took a lot of effort, eyeballs, documentation reading, tears, cursing to the gods to get there, but I eventually had an implementation that worked, and it worked well. Granted, it takes time to generate the tiles, and I needed to work on improving the performance, but it was such a beautiful sight to see. The seamless movement and integration, the pins being displayed on the map in their respective locations... it felt wrong, but it felt right.
Aside: Huge shoutout to Paul Straw, 2DArray, The3DPrintist, and gurtt for helping me in a late-night ensemble programming session to getting this to work. I would’ve likely been stuck on the mapping for weeks, and having multiple eyeballs on it massively helped push this along. 🏆
Admittedly, there are a few parts of the the MapKit implementation that confuse me to this day. One quick trip to the CubiomesKit repository would show all my comments, screaming that it’s “magic voodoo shit”. Perhaps one day I’ll revisit the topic and research why those bits of the code works the way it does...
The final push... for the App Store
After the final pieces were put into place, I pivoted to ironing out every last major bug and accessibility issue, collecting and addressing feedback I’ve received with the new implementation. The map view did eventually get a cache so that I didn’t need to call Cubiomes as often to render the data, and I fixed a flickering issue with the pins by limiting when pins should be removed and re-added into the view. I also improved general messaging in the app to make sure expectations are set accordingly when using it; namely, I wanted to make sure that those downloading the iOS/iPadOS app understood the app works for Minecraft Java edition, and not Minecraft Bedrock.
With everything sorted out, I sent my release candidate to Apple to be reviewed for the App Store. Unsurprisingly, I was rejected the first time because the reviewer didn’t get the tips on how to create a pin. To address this, I quickly added in a button to create a pin without visiting a location first, ensuring that the feature was as visible as possible. I then sent that build to Apple, hoping that all the issues would be resolved and that I would be approved.
To my dismay, this wasn’t the case; the reviewers took issue with my direct mentioning of Minecraft, and that I was, allegedly, blatantly trying to be a copycat or ride off Minecraft’s trademark to gain popularity. I had a back and forth with the App Store review team to determine which parts were deemed unacceptable by the official Minecraft usage guidelines from Mojang AB/Microsoft. Simultaneously, I set up a page on Itch in the event that it didn’t work out, and that I wouldn’t be able to release at all. Thankfully, a quick discussion with fellow peers to decipher what Apple wanted helped, and I quickly resubmitted, changing relevant parts of the metadata to say “for Minecraft Java Edition” instead of “Minecraft Java”, and that got approved. Not long after, I pulled the trigger to release it, and Alidade was made available on the App Store for macOS, iOS, and iPadOS.
I’m pleased with what I have on the App Store today, but I see this as the beginning for Alidade. I have a backlog of ideas that I want to implement for future versions, such as a photo gallery for all the pins in your map, adding tags to photos for filtering in searches, and writing your own custom directions to get between two places. Likewise, I’m sure that players will have requests of their own that they’d like to see implemented into the app. If I can manage it, I’d love to get an Android port in via Skip as well, expanding the general availability of the app.
Aside this, it’s been a short yet wild journey for Alidade. Thankfully, Alidade does exactly what I need it to, and I use it all the time whenever I’m playing in my forever world. I did eventually find that pale garden I was looking for, and I have the pins to show for it. And now my map serves as my guide and a scrapbook for all that I’m doing in the world; it feels surreal yet amazing to hold a digital memento of what I’ve accomplished in both the app and forever world sense. I suspect that as I keep updating Alidade, my forever world will grow with it.
Many thanks to my fellow colleagues, friends, family, and peers for helping get Alidade to where it is today. ❤️
App Store: https://apps.apple.com/us/app/alidade/id6741483898
Itch: https://marquiskurt.itch.io/alidade